Build an App with AI in Minutes using OpenHands AI Engineer - Install Locally
OpenHands is an open-source AI coding tool developed by the All-Hands-AI team. OpenHands is not just a coding tool; it’s your AI coding assistant that can do everything a human developer can: modify code, run commands, browse the web, call APIs, and, yes—even copy code snippets from StackOverflow.
Prerequisites
- A Virtual Machine (such as the ones provided by NodeShift) with at least:
- 4 vCPUs
- 4GB RAM
- 50GB SSD
- Ubuntu 22.04 VM
- Access to your server via SSH
Step-by-Step process to Install OpenHands AI Engineer Locally
For the purpose of this tutorial, we will use a CPU-powered Virtual Machine offered by NodeShift; however, you can replicate the same steps with any other cloud provider of your choice. NodeShift provides the most affordable Virtual Machines at a scale that meets GDPR, SOC2, and ISO27001 requirements.
However, if you prefer to use a GPU-powered Virtual Machine, you can still follow this guide. OpenHands works on GPU-based VMs as well, performance is better and faster than CPU VM on GPU VM. The installation process remains largely the same, allowing you to achieve similar functionality on a GPU-powered machine. NodeShift’s infrastructure is versatile, enabling you to choose between GPU or CPU configurations based on your specific needs and budget.
Let’s dive into the setup and installation steps to get OpenHands running efficiently on your chosen virtual machine.
Step 1: Sign Up and Set Up a NodeShift Cloud Account
- Visit the NodeShift Platform and create an account.
- Once you have signed up, log into your account.
- Follow the account setup process and provide the necessary details and information.

Step 2: Create a Compute Node (CPU Virtual Machine)
NodeShift Compute Nodes offers flexible and scalable on-demand resources like NodeShift Virtual Machines which are easily deployed and come with general-purpose, CPU-powered, or storage-optimized nodes.
- Navigate to the menu on the left side.
- Select the Compute Nodes option.
- Click the Create Compute Nodes button in the Dashboard to create your first deployment.

Step 3: Select a Region and Choose VM Configuration
- In the "Compute Nodes" tab, select a geographical region where you want to launch the Virtual Machine (e.g., the United States).
- In the Choose VM Configuration section, select the number of cores, amount of memory, boot disk type, and size that best suits your needs.
- You will have at least 50 GB of storage. If you use NodeShift and need more resources, you can always resize to add more CPUs and RAM.

Step 4: Choose an Image
Next, you will need to choose an image for your Virtual Machine. We will deploy the VM on Ubuntu, but you can choose according to your preference. Other options like CentOS and Debian are also available to Install OpenHands.

Step 5: Choose the Billing Cycle & Authentication Method
- Select the billing cycle that best suits your needs. Two options are available: Hourly, ideal for short-term usage and pay-as-you-go flexibility, or Monthly, perfect for long-term projects with a consistent usage rate and potentially lower overall cost.
- Select the authentication method. There are two options: Password and SSH Key. SSH keys are a more secure option. To create them, refer to our official documentation.

Step 6: Additional Details & Complete Deployment
- The ‘Finalize Details' section allows users to configure the final aspects of the Virtual Machine.
- After finalizing the details, click the 'Create' button, and your Virtual Machine will be deployed.

Step 7: Virtual Machine Successfully Deployed
You will get visual confirmation that your node is up and running.

Step 8: Connect via SSH
- Open your terminal
- Run the SSH command:
For example, if your username is root, the command would be:
ssh root@ip
- If SSH keys are set up, the terminal will authenticate using them automatically.
- If prompted for a password, enter the password associated with the username on the VM.
- You should now be connected to your VM!

Step 9: Install Docker
Run the following command to update your package list:
sudo apt update

Then, run the following command to install the docker:
sudo apt install docker.io

Next, run the following commands to enable, start and verify docker installation:
sudo systemctl enable docker
sudo systemctl start docker
docker --version
Step 10: Install OpenHands
Run the following command to install the OpenHands:
docker pull docker.all-hands.dev/all-hands-ai/runtime:0.13-nikolaik

Step 11: Run OpenHands
Execute the following command to run the OpenHands:
docker run -it --pull=always \
    -e SANDBOX_RUNTIME_CONTAINER_IMAGE=docker.all-hands.dev/all-hands-ai/runtime:0.13-nikolaik \
    -v /var/run/docker.sock:/var/run/docker.sock \
    -p 3000:3000 \
    -e LOG_ALL_EVENTS=true \
    --add-host host.docker.internal:host-gateway \
    --name openhands-app \
    docker.all-hands.dev/all-hands-ai/openhands:0.13
Step 12: SSH port forwarding
Run the following command on your local machine terminal to set up SSH port forwarding to access your OpenHands application running on port 3000 on your VM (84.32.34.117):
ssh -L 3000:localhost:3000 root@84.32.34.117

Step 13: Access Openhands on Browser
After installation and SSH port forwarding, access OpenHands by navigating to http://localhost:3000 in your web browser.

Step 14: AI Provider Configuration
OpenHands supports various language models through the litellm library. By default, it uses GPT-4 from OpenAI, but you can configure it to use other models like Claude or Llama.
During this step, you will be prompted to enter:
- LLM API Key
- Model Name
- Other relevant variables
Note: If you've previously run OpenHands using Docker, some environment variables may already be set. The configuration priority is as follows:
- Environment variables
config.tomlvariables- Default variables
For a complete list of available LMs and providers, refer to the litellm documentation.

Step 15: Create OpenAI API Key
To use the OpenAI API, you need to create an API key. This key will allow you to securely access OpenAI's services. Follow these steps to generate your API key:
- Log In to OpenAI:
Visit the OpenAI platform and log in to your account. If you do not have an account, you will need to sign up.
- Access the API Section:
Once logged in, navigate to the top right corner of the page where your profile icon is located. Click on it and select API from the dropdown menu. Alternatively, you can directly access the API section by clicking on API in the main dashboard.
- Create a New Secret Key:
In the API section, look for an option that says Create new secret key or View API Key. Click on this option.

- Generate the Key:
After clicking on create, a new API key will be generated for you. Make sure to copy this key immediately as it will only be shown once.

Step 16: Select the LLM Provider and Model
- In the LLM Provider option, select the LLM provider.
- Then, in the LLM Model option, select the model.

Step 17: Enter Your API Key
- In the OpenAI configuration section, you will see a field labeled API Key.
- Paste your previously copied OpenAI API key into this field. Ensure there are no extra spaces before or after the key and save it.
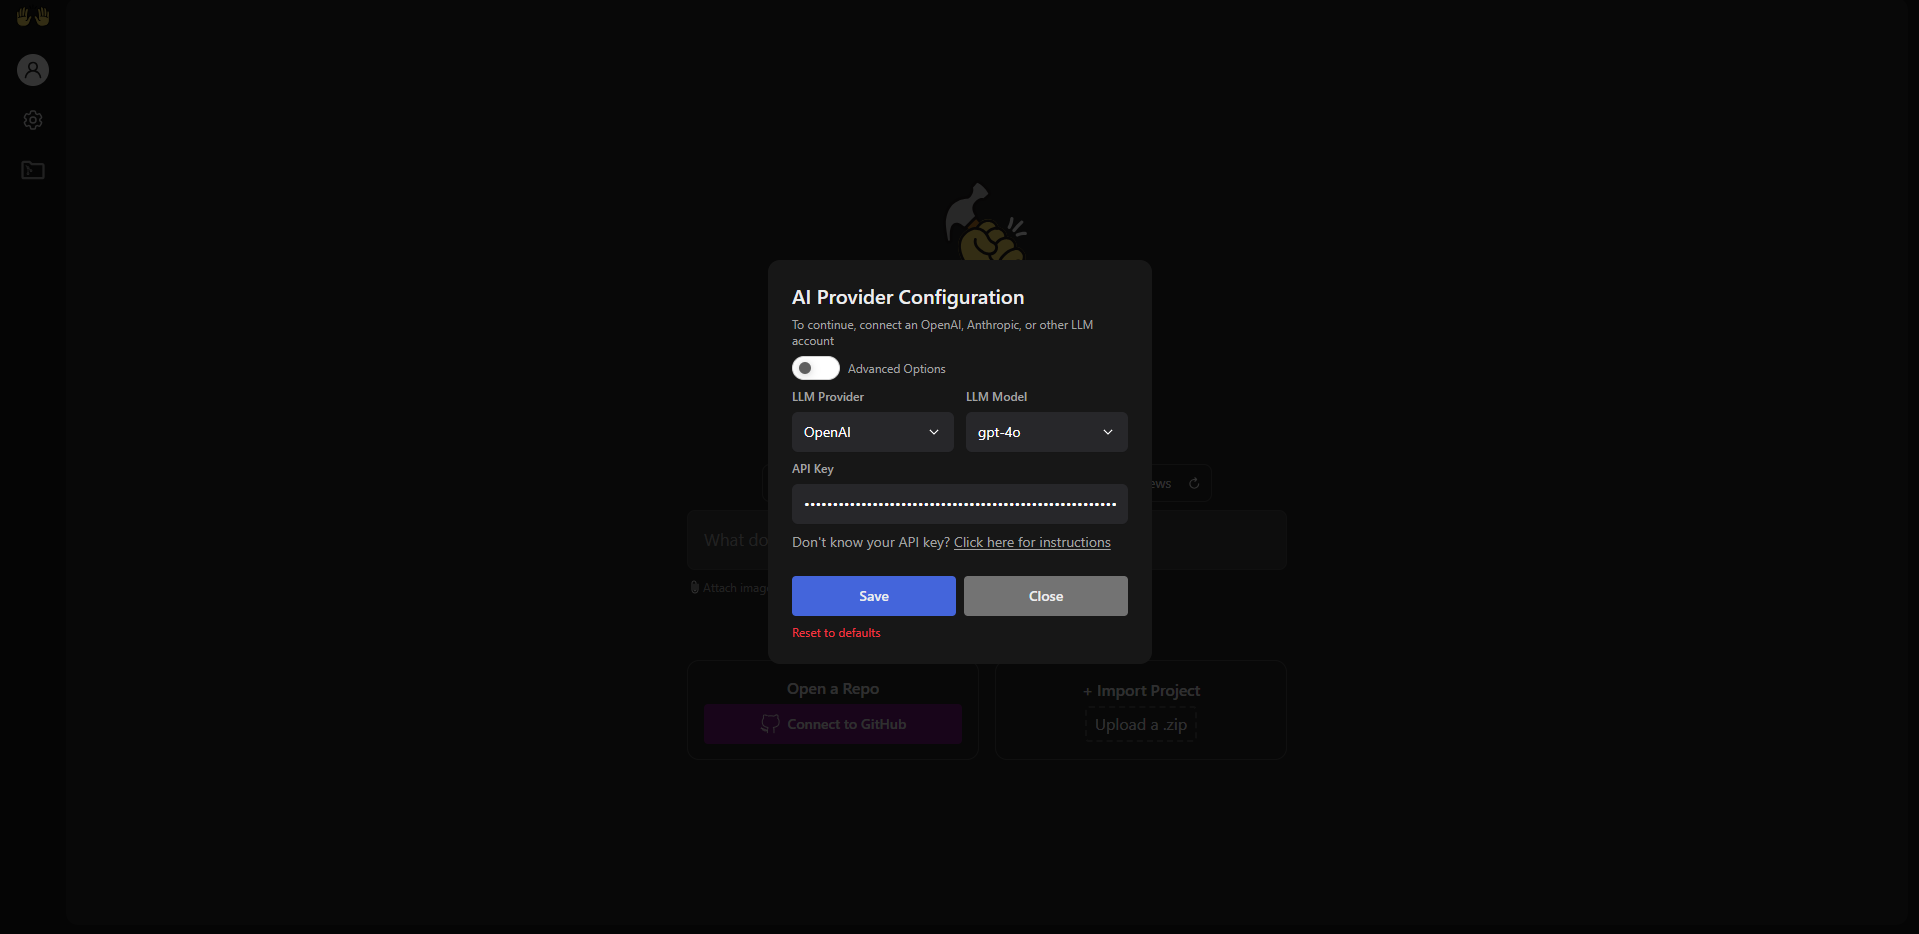
Step 18: Save Your Configuration
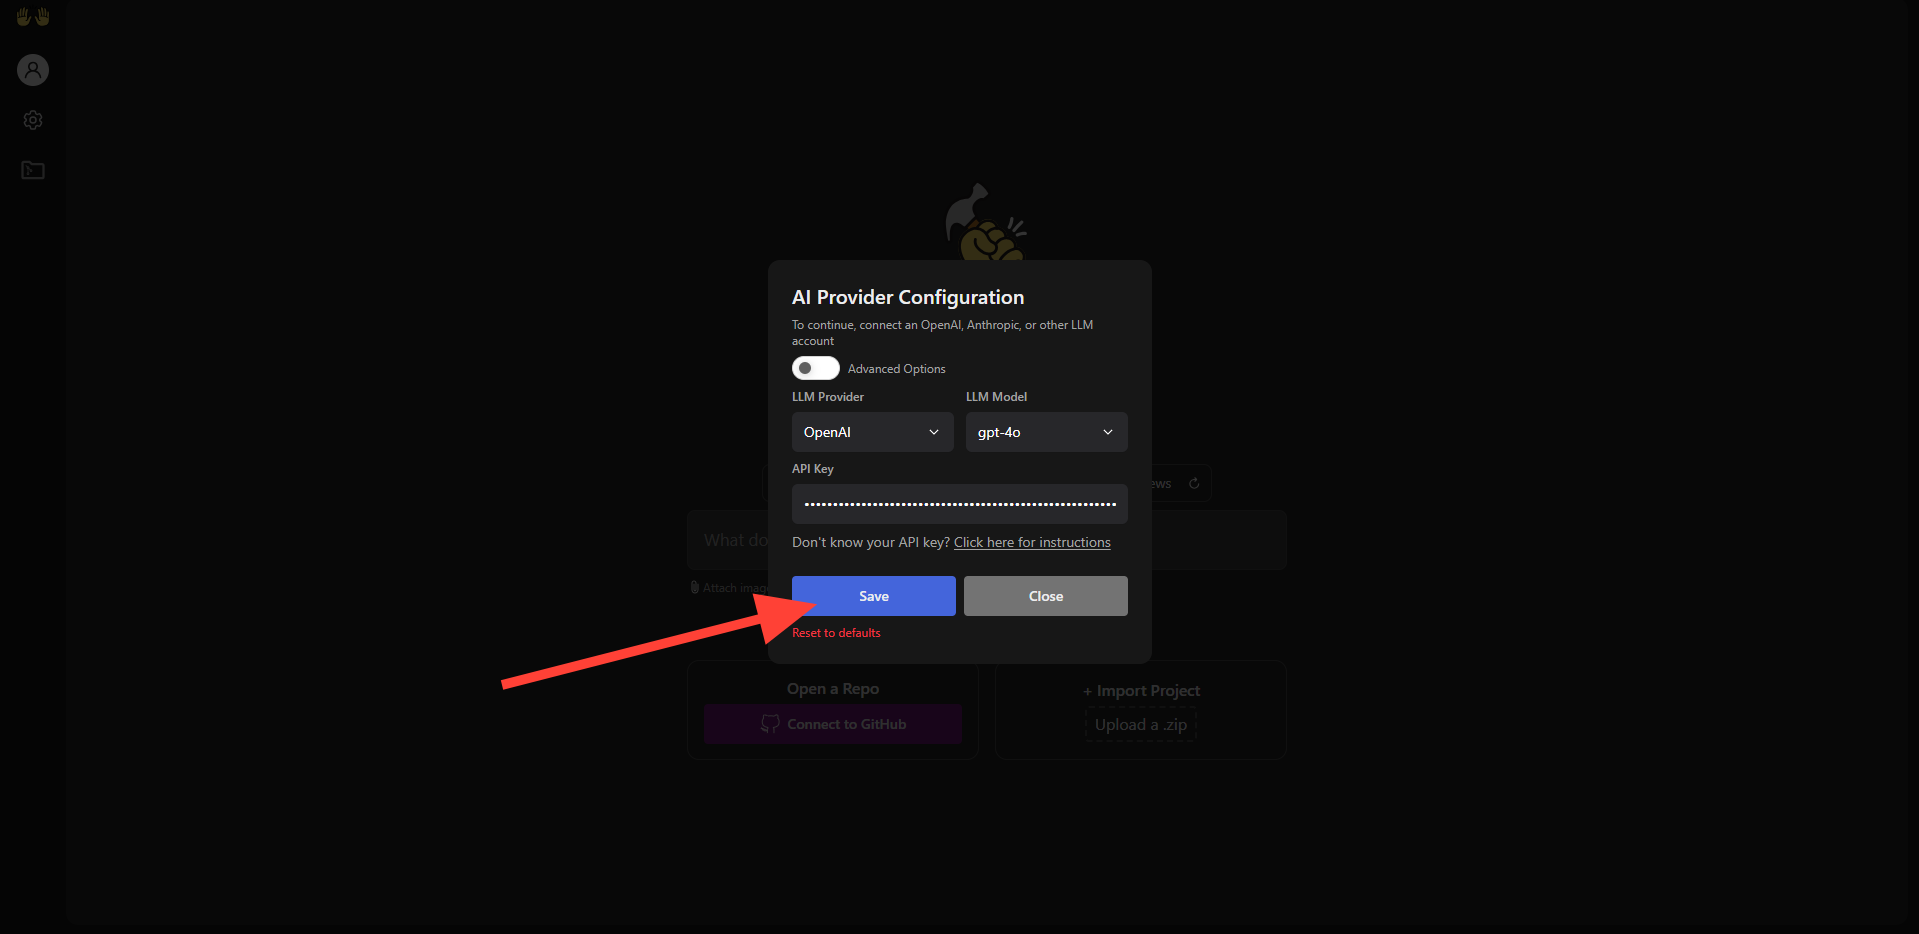
- After entering all necessary information and adjusting settings, click on the Save button at the bottom of the configuration page.
- This action will store your settings and apply them to your OpenHands AI instance.
Step 19: Give Prompt and Generate Output
Prompt: Build a Todo List in ReactJS

Output


Conclusion
In this guide, we explain the OpenHands AI open-source coding tool and provide a step-by-step tutorial on installing OpenHands AI Engineer locally on a NodeShift virtual machine. You'll learn how to install the required software, set up essential tools like Docker, and build your first app with OpenHands AI.
For more information about NodeShift:


