Convert Screenshots and Designs to Clean Code with Screenshot-to-Code Tool
Screenshot-to-Code is a handy tool that helps turn your screenshots, design mockups, or prototypes into clean and functional code effortlessly. It supports a variety of coding stacks, including HTML with Tailwind or CSS, React, Vue, Bootstrap, Ionic, and even SVG. It also offers options for enhancing designs with image generation capabilities. Open-source and available under the MIT license, it welcomes contributions from the community and is completely free to use.
Prerequisites
- A Virtual Machine (such as the ones provided by NodeShift) with at least:
- 4 vCPUs
- 4GB RAM
- 50GB SSD
- Ubuntu 22.04 VM
- Access to your server via SSH
Step-by-Step process to Install Screenshot to Code Tool Locally
For the purpose of this tutorial, we will use a CPU-powered Virtual Machine offered by NodeShift; however, you can replicate the same steps with any other cloud provider of your choice. NodeShift provides the most affordable Virtual Machines at a scale that meets GDPR, SOC2, and ISO27001 requirements.
However, if you prefer to use a GPU-powered Virtual Machine, you can still follow this guide. Screenshot to Code works on GPU-based VMs as well, performance is better and faster than CPU VM on GPU VM. The installation process remains largely the same, allowing you to achieve similar functionality on a GPU-powered machine. NodeShift’s infrastructure is versatile, enabling you to choose between GPU or CPU configurations based on your specific needs and budget.
Let’s dive into the setup and installation steps to get Screenshot to Code running efficiently on your chosen virtual machine.
Step 1: Sign Up and Set Up a NodeShift Cloud Account
- Visit the NodeShift Platform and create an account.
- Once you have signed up, log into your account.
- Follow the account setup process and provide the necessary details and information.

Step 2: Create a Compute Node (CPU Virtual Machine)
NodeShift Compute Nodes offers flexible and scalable on-demand resources like NodeShift Virtual Machines which are easily deployed and come with general-purpose, CPU-powered, or storage-optimized nodes.
- Navigate to the menu on the left side.
- Select the Compute Nodes option.
- Click the Create Compute Nodes button in the Dashboard to create your first deployment.

Step 3: Select Virtual Machine Uptime Guarantee
- Choose the Virtual Machine Uptime Guarantee option based on your needs. NodeShift offers an uptime SLA of 99.99% for high reliability.
- Click on the "Show reliability info" to review detailed SLA and reliability options.

Step 4: Select a Region
In the "Compute Nodes" tab, select a geographical region where you want to launch the Virtual Machine (e.g., the United States).

Step 5: Choose VM Configuration
- NodeShift provides two options for VM configuration:
- Manual Configuration: Adjust the CPU, RAM, and Storage to your specific requirements.
- Select the number of CPUs (1–96).
- Choose the amount of RAM (1 GB–768 GB).
- Specify the storage size (20 GB–4 TB).
- Predefined Configuration: Choose from predefined configurations optimized for General Purpose, CPU-Powered, or Storage-Optimized nodes.
- Manual Configuration: Adjust the CPU, RAM, and Storage to your specific requirements.
- If you prefer custom specifications, manually configure the CPU, RAM, and Storage. Otherwise, select a predefined VM configuration suitable for your workload.

Step 6: Choose an Image
Next, you will need to choose an image for your Virtual Machine. We will deploy the VM on Ubuntu, but you can choose according to your preference. Other options like CentOS and Debian are also available to Install Screenshot to Code.

Step 7: Choose the Billing Cycle & Authentication Method
- Select the billing cycle that best suits your needs. Two options are available: Hourly, ideal for short-term usage and pay-as-you-go flexibility, or Monthly, perfect for long-term projects with a consistent usage rate and potentially lower overall cost.
- Select the authentication method. There are two options: Password and SSH Key. SSH keys are a more secure option. To create them, refer to our official documentation.

Step 8: Additional Details & Complete Deployment
- The ‘Finalize Details' section allows users to configure the final aspects of the Virtual Machine.
- After finalizing the details, click the 'Create' button, and your Virtual Machine will be deployed.

Step 9: Virtual Machine Successfully Deployed
You will get visual confirmation that your node is up and running.

Step 10: Connect via SSH
- Open your terminal
- Run the SSH command:
For example, if your username is root, the command would be:
ssh root@ip
- If SSH keys are set up, the terminal will authenticate using them automatically.
- If prompted for a password, enter the password associated with the username on the VM.
- You should now be connected to your VM!

Step 11: Clone the Repository
Run the following command in the terminal to clone the repository:
git clone https://github.com/abi/screenshot-to-code.git

Then, run the following command in terminal to navigate to the main project directory:
cd screenshot-to-codeNext, run the following command in terminal to navigate to the backend project directory:

Step 12: Set Up the Backend with Poetry
Run the following command in the terminal to install the latest version of poetry using the official installation script:
curl -sSL https://install.python-poetry.org | python3 -
After installation, run the following command to ensure poetry is available in your PATH:
export PATH="$HOME/.local/bin:$PATH"
The, run the following command to verify that poetry is installed by checking the version:
poetry --version
Poetry is a powerful and easy-to-use tool for managing and packaging dependencies in Python projects. It simplifies adding, removing, and updating libraries and keeping project settings and dependencies organized using the pyproject.toml file. It does not require multiple files like requirements.txt or setup.py making the dependency management process easy.

Step 13: Run the Backend Port
Run the following command to start the backend port:
poetry install
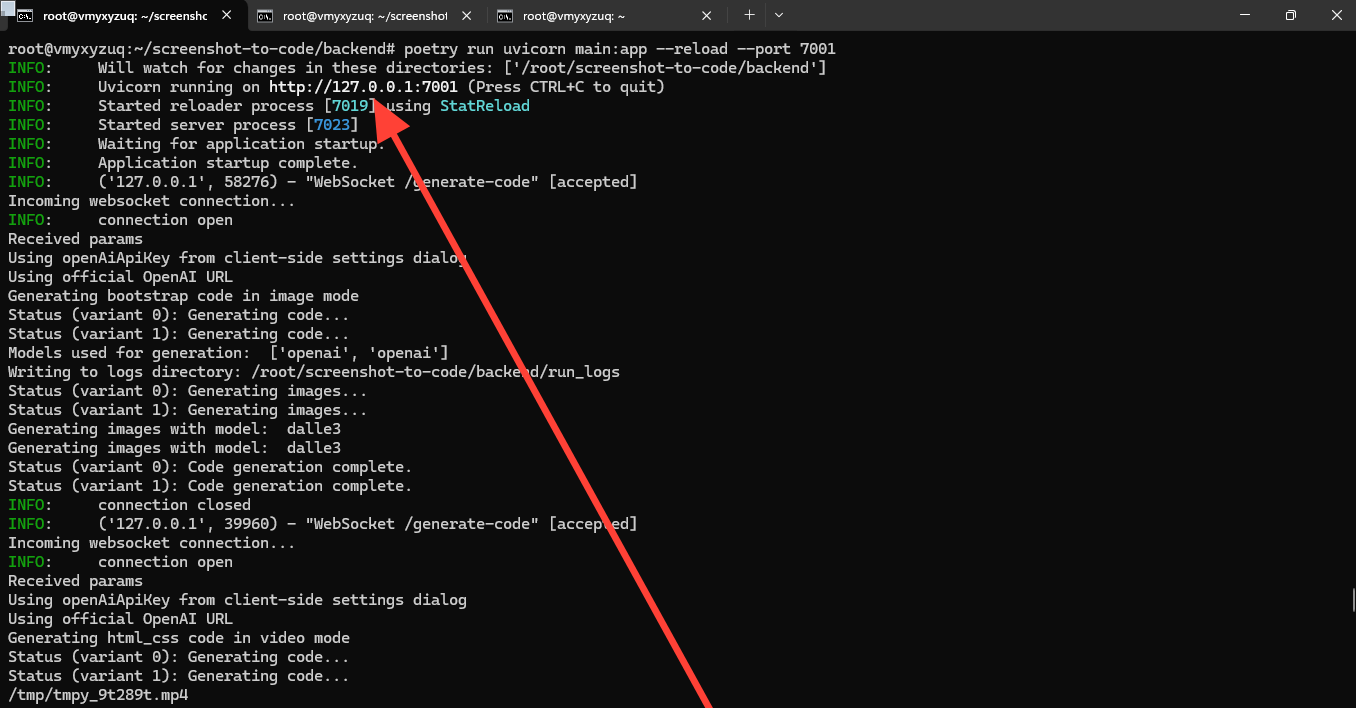
poetry run uvicorn main:app --reload --port 7001

Your backend is successfully running on http://127.0.0.1:7001 . The warnings you see are just informational, indicating that Poetry couldn't find specific package files for a standalone install. If you're only managing dependencies and not distributing the backend as a standalone package, you can ignore these warnings or set package-mode = false in pyproject.toml to suppress them in the future.


Step 14: Set Up the Frontend
Run the following command in terminal to navigate to the frontend project directory:
cd frontendStep 15: Install Yarn
Run the following command to add the Yarn package repository and install Yarn:
curl -sS https://dl.yarnpkg.com/debian/pubkey.gpg | sudo apt-key add -
echo "deb https://dl.yarnpkg.com/debian/ stable main" | sudo tee /etc/apt/sources.list.d/yarn.list
sudo apt update && sudo apt install yarn -y
Yarn stands for Yet Another Resource Negotiator and it is a package manager just like npm. It was developed by Facebook and is now open-source. The intention behind developing yarn(at that time) was to fix performance and security concerns with npm.
Step 16: Install Node.js 20 (Recommended LTS)
Run the following command to set up Node.js 20:
curl -fsSL https://deb.nodesource.com/setup_20.x | sudo -E bash -
sudo apt install -y nodejs
Then, run the following command to verify the Node.js version:
node --version
It should now display 20.x.x.
Node.js is a cross-platform, open-source JavaScript runtime environment that can run on Windows, Linux, Unix, macOS, and more. Node.js runs on the V8 JavaScript engine, and executes JavaScript code outside a web browser.
Step 17: Run the Frontend Port
Run the following command to start the frontend port:
yarn
yarn dev
Frontend: Running on http://localhost:5173


It looks like both the backend and frontend servers are running successfully:
- Backend: Running on
http://127.0.0.1:7001 - Frontend: Running on
http://localhost:5173
Step 18: SSH Port Forwarding
Run the following command on your local machine terminal to set up SSH port forwarding to access your Screenshot to Code Tool running on port 5173 on your VM:
ssh -L 5173:localhost:5173 -L 7001:localhost:7001 root@84.32.34.49
Your VM IP: root@84.32.34.49(Like this)

Step 19: Access Application
You can now access the application by opening http://localhost:5173 in your browser. If you want to access it from a different device on the network, you can restart the frontend with --host to expose it.

Step 20: Create OpenAI API Key
To use the OpenAI API, you need to create an API key. This key will allow you to securely access OpenAI's services. Follow these steps to generate your API key:
- Log In to OpenAI:
Visit the OpenAI platform and log in to your account. If you do not have an account, you will need to sign up.
- Access the API Section:
Once logged in, navigate to the top right corner of the page where your profile icon is located. Click on it and select API from the dropdown menu. Alternatively, you can directly access the API section by clicking on API in the main dashboard.
- Create a New Secret Key:
In the API section, look for an option that says Create new secret key or View API Key. Click on this option.

- Generate the Key:
After clicking on create, a new API key will be generated for you. Make sure to copy this key immediately as it will only be shown once.

Step 21: Adding API Keys
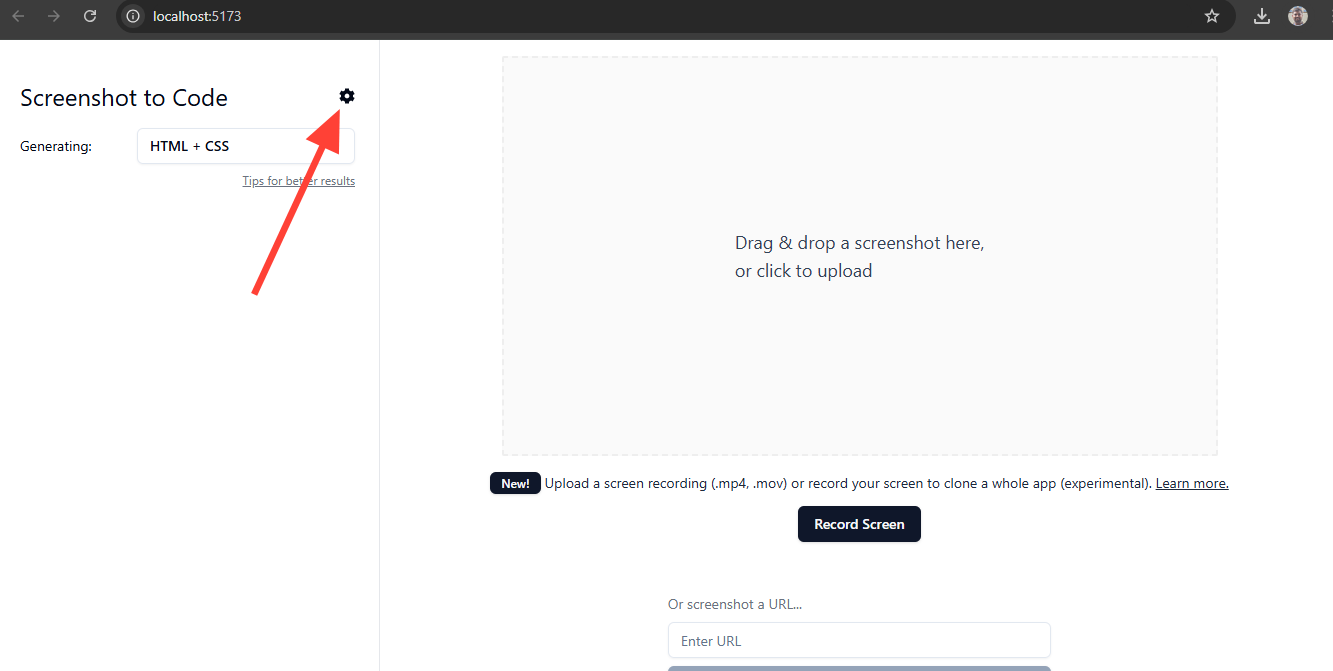
Click on the setting button to add the OpenAI API key.
Screenshot to Code Tool supported AI models:
- Claude Sonnet 3.5 - Best model!
- GPT-4o - also recommended!
- DALL-E 3 or Flux Schnell (using Replicate) for image generation

Step 22: Selected Stack
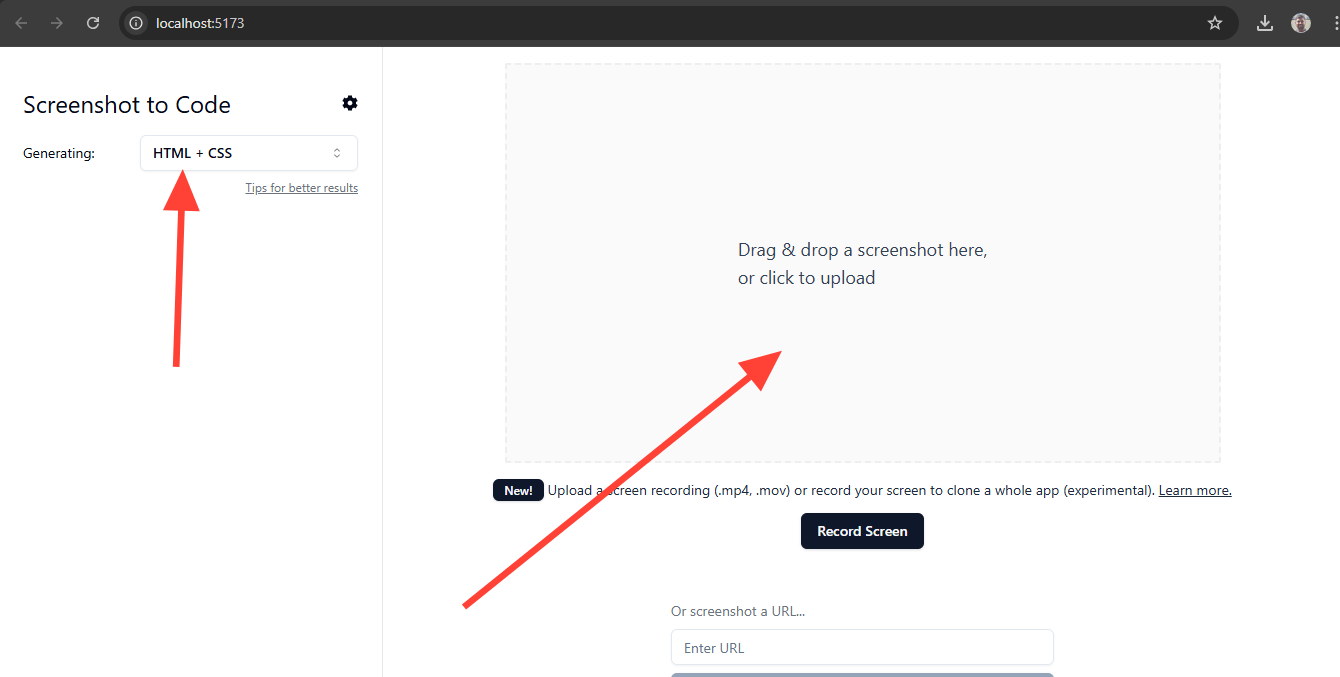
Select the stack from generating option.
Screenshot to Code Tool supported stacks:
- HTML + Tailwind
- HTML + CSS
- React + Tailwind
- Vue + Tailwind
- Bootstrap
- Ionic + Tailwind
- SVG

Step 23: Drag Image or Video
From the drag and drop option select the image or video.
Step 24: Generate Output
And, check the output.


Step 25: Check the Code of Image or Video
Now check the code of image or video from the code option.


Conclusion
In this guide, we explain the Screenshot-to-Code AI open-source tool and provide a step-by-step tutorial on installing Screenshot-to-Code locally on a NodeShift virtual machine. You'll learn how to install the required software, set up essential tools like poetry, yarn, nodejs and convert your first image to code with Screenshot-to-Code tool.
For more information about NodeShift:


