How to Install 3x-ui / XRay VPN in the Cloud

Recently, there has been a sharp increase in demand for reliable and secure VPN services. This is because popular protocols, such as OpenVPN and WireGuard, used to bypass Internet censorship, have been blocked numerous times. In these conditions, finding a VPN to protect confidential user data and provide stable access to blocked resources is essential.
One promising solution is 3X-UI, a fork of the popular X-UI graphical shell for the X-Ray VPN server. 3X-UI supports many modern protocols, including Shadowsocks and VLESS with XTLS. The panel installs in Docker in just a few minutes and has a user-friendly interface in English and Russian.
The main advantages of 3X-UI over other VPNs are its advanced customization options and enhanced security. Unlike many analogs, this panel offers high operational stability. Advanced users will appreciate the flexible server configuration options and fine-tuning of protocols for the most secure and fastest connection.
3X-UI Main Features
- Traffic Encryption: Uses VLESS, Shadowsocks-2022, and XRay (XTLS) for secure, encrypted traffic.
- Multi-Factor Authentication: Enhances security by requiring multiple verification steps.
- Customizable Settings: Flexible connection settings for encryption type, ports, and protocols.
- Speed Optimization: Boosts connection speed with TCP Fast Open and Congestion Control technologies.
- Cross-Platform Support: Compatible with Windows, MacOS, Linux, Android, and iOS.
- Open Source & Reliable: Open for developer contributions; uses stable, high-speed protocols.
Thus, 3X-UI is a reliable solution for secure internet access for those with all kinds of web surfing restrictions. Its flexibility, performance, and user-friendly interface make it an excellent choice for power users who need a functional and secure VPN in 2023.
3X-UI may scare off an inexperienced user, as not all the steps to set it up are intuitive. To make it easier to work with 3X-UI, we have created a guide allowing everyone to use this VPN regardless of their level of technical expertise and on different operating systems—Windows, Android, and iOS.
Step-by-step process to Install 3x-ui in the Cloud
For the purpose of this tutorial, we will use a CPU-powered Virtual Machine offered by NodeShift; however, you can replicate the same steps with any other cloud provider of your choice. NodeShift offers the most affordable Virtual Machines, at 70% cheaper compared to AWS, Google Cloud and Microsoft Azure while ensuring compliance with GDPR, SOC2 and ISO27001.
In order to deploy a NodeShift Virtual Machine, follow the guidelines here:
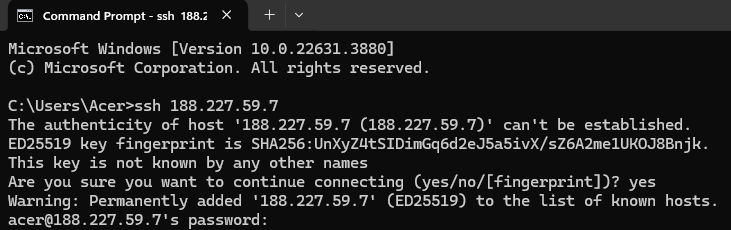
Step 1: Connect to the Virtual Machine using SSH or Username/Password
- NodeShift Compute VMs can be connected and controlled through a terminal and SSH.
- Open your terminal paste the IP with SSH and set up the password.
- And then you will get connected to the root user.
Step 2: Update the System, packages, and repositories
First, ensure your system is up to date. Open a terminal and run the command below:
sudo apt update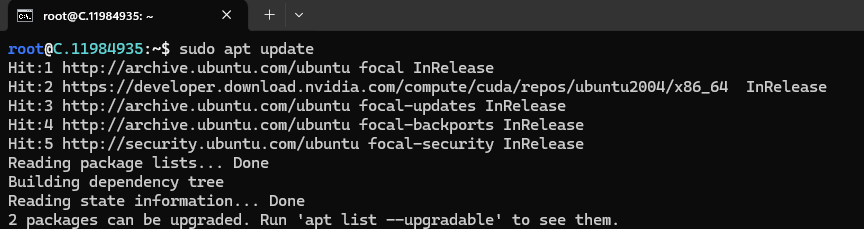
After executing the update command, execute the following command to upgrade your systems’ installed packages.
sudo apt upgrade

You can also combine both commands and run them simultaneously.
Step 3: Download and Run the script
Now, you can download and run the script according to the instructions at https://github.com/MHSanaei/3x-ui.
Run the following command to Download the script:
bash <(curl -Ls https://raw.githubusercontent.com/mhsanaei/3x-ui/master/install.sh)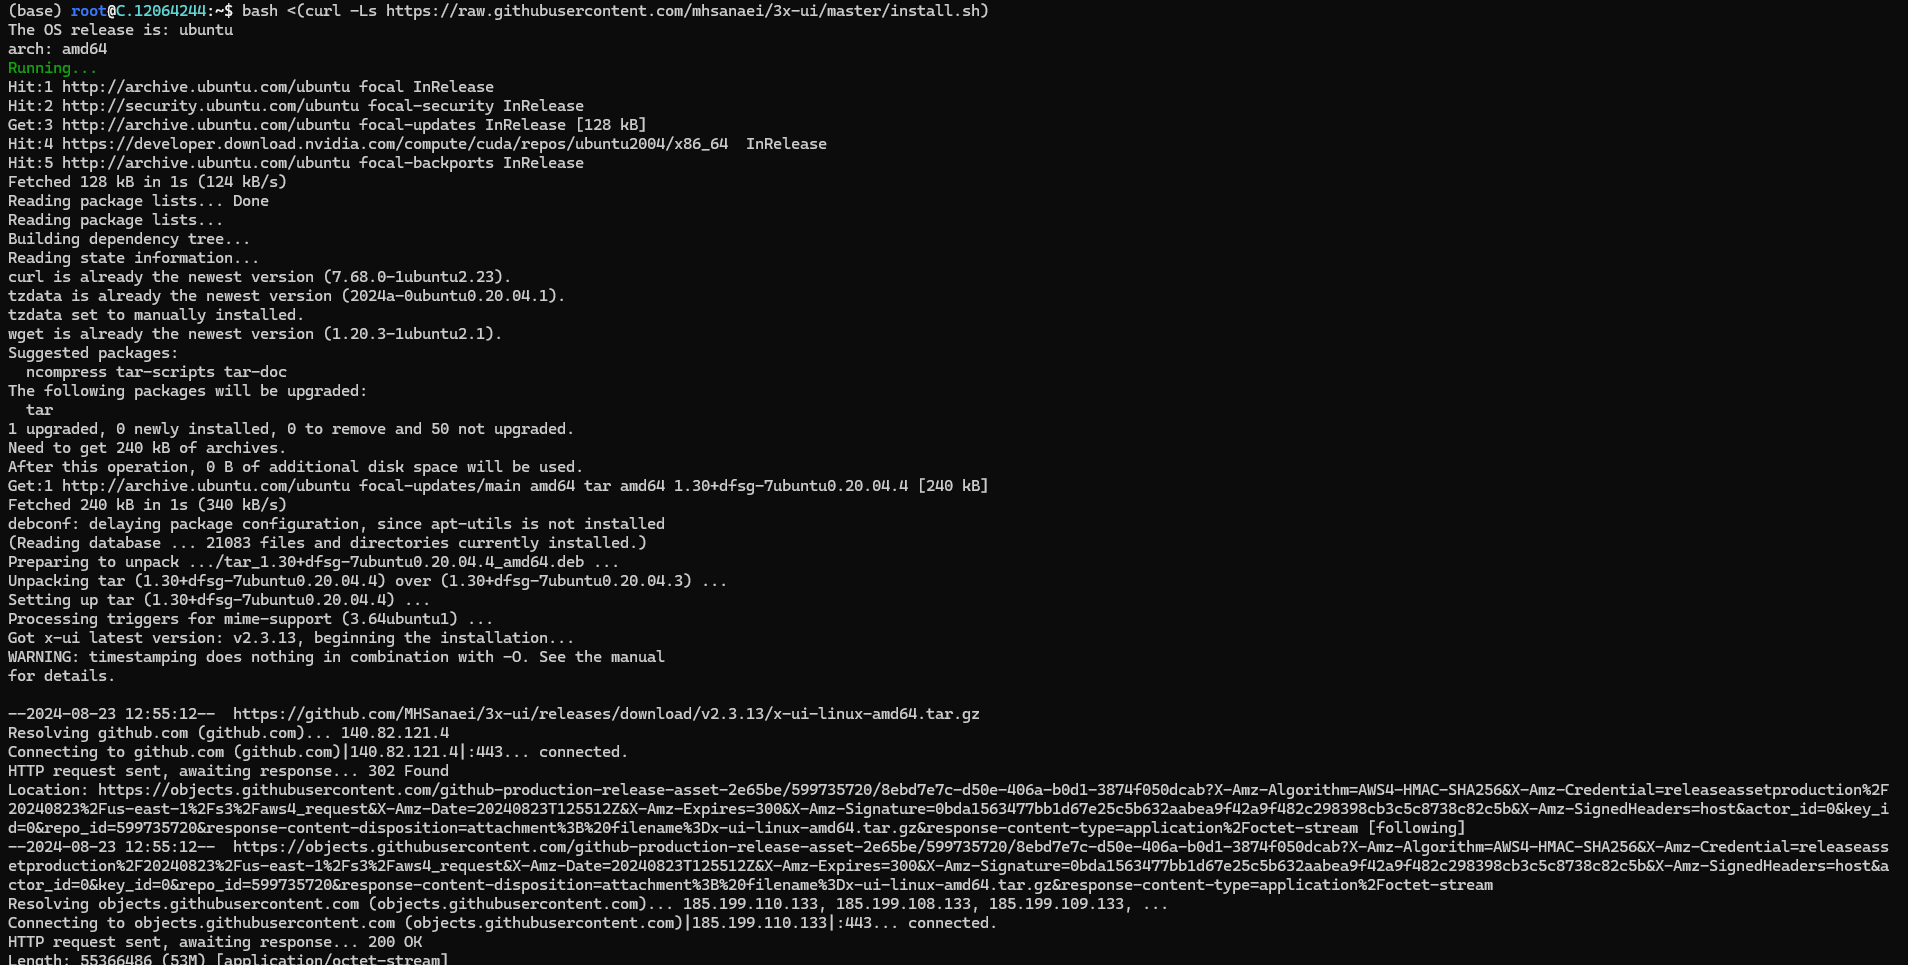
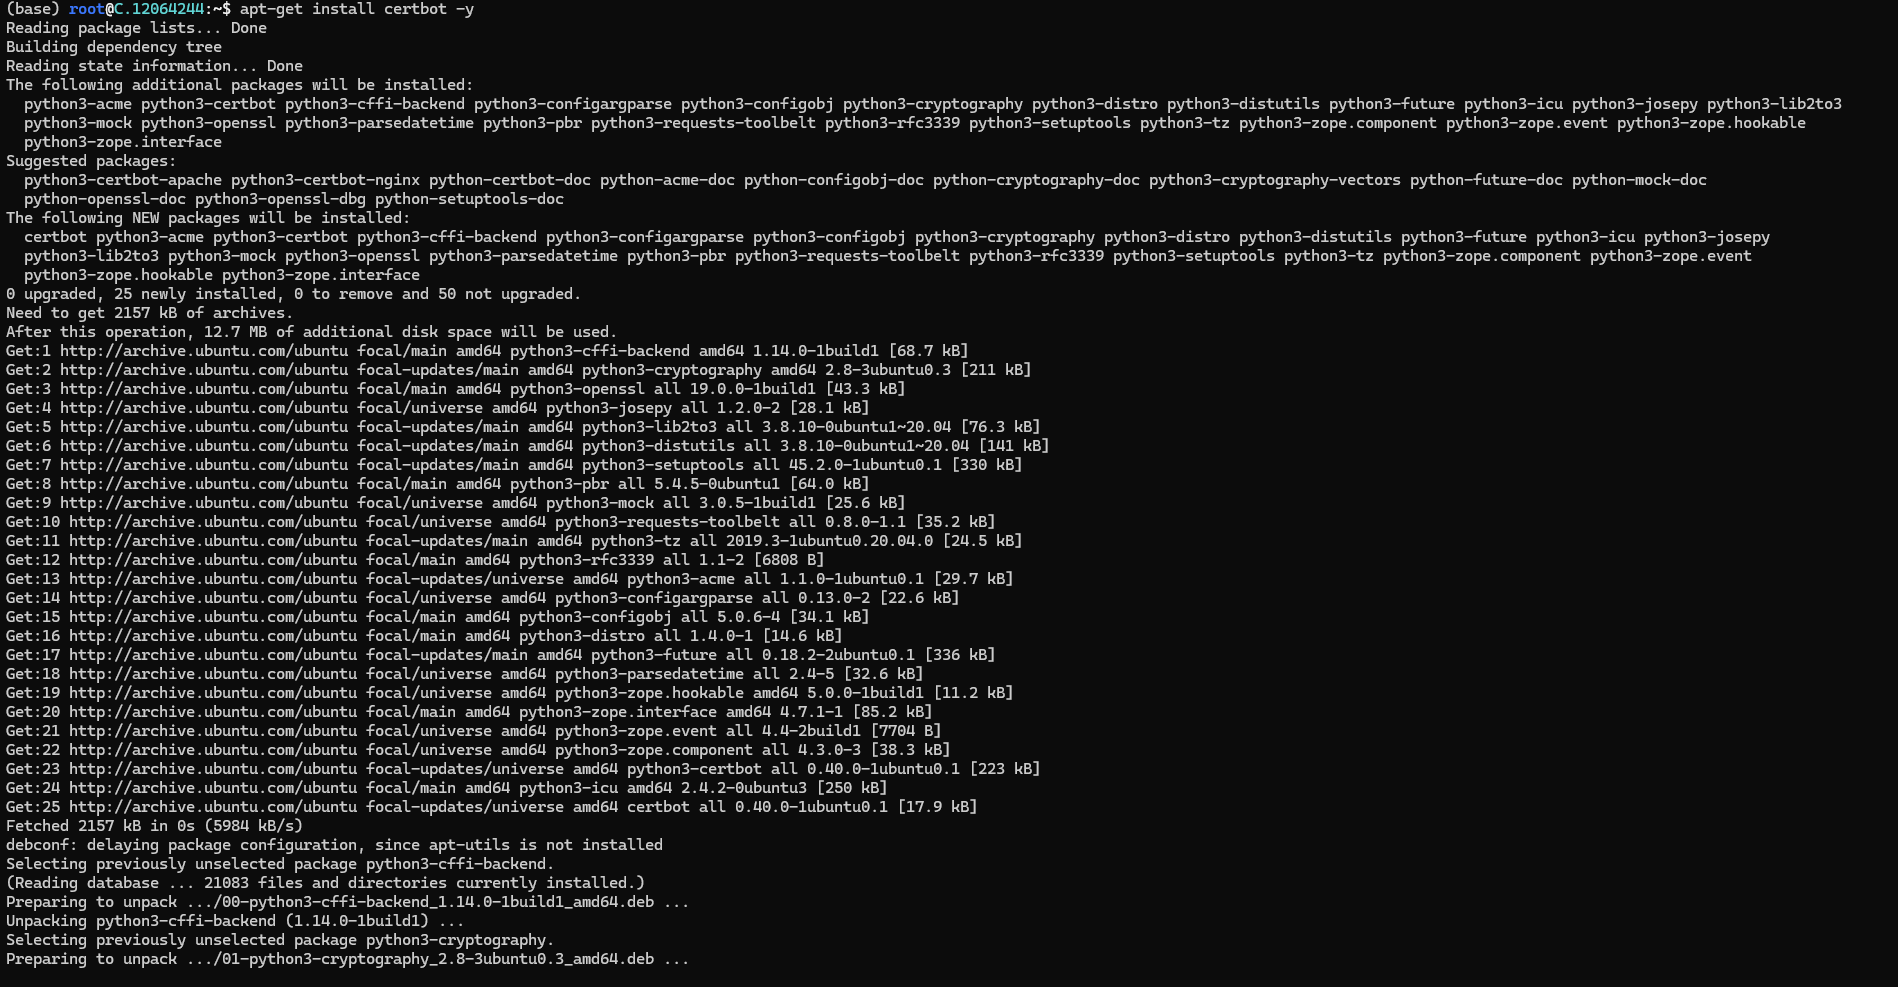
Step 4: Obtain the SSL certificate and key
Run the following command to obtain the SSL certificate and key:
apt-get install certbot -y
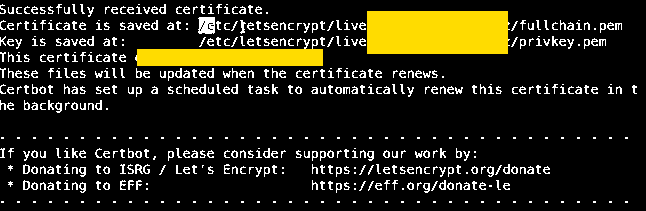
Run the following command to obtain an SSL/TLS certificate from Let's Encrypt, a free and open certificate authority.
certbot certonly --standalone --agree-tos --register-unsafely-without-email -d yourdomain.com

In place of yourdomain.com use your domain.
Run the following command to test the renewal process of SSL/TLS certificates managed by Certbot.
certbot renew --dry-run

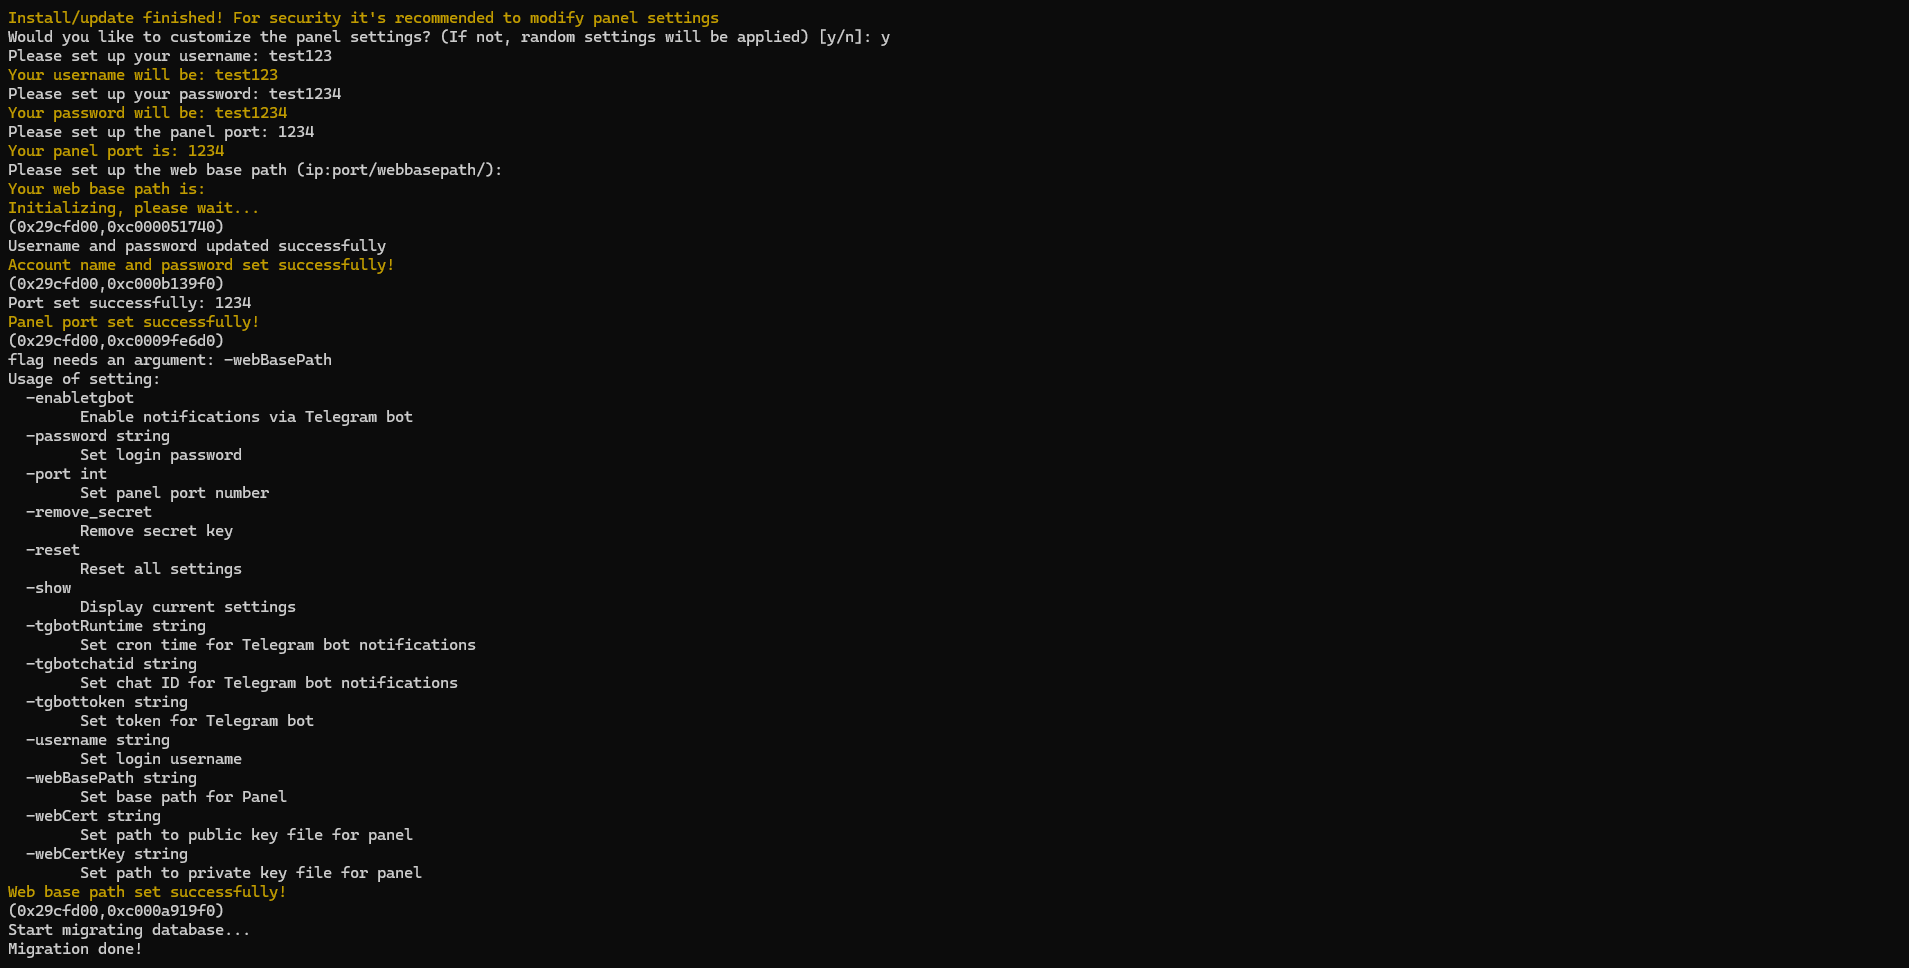
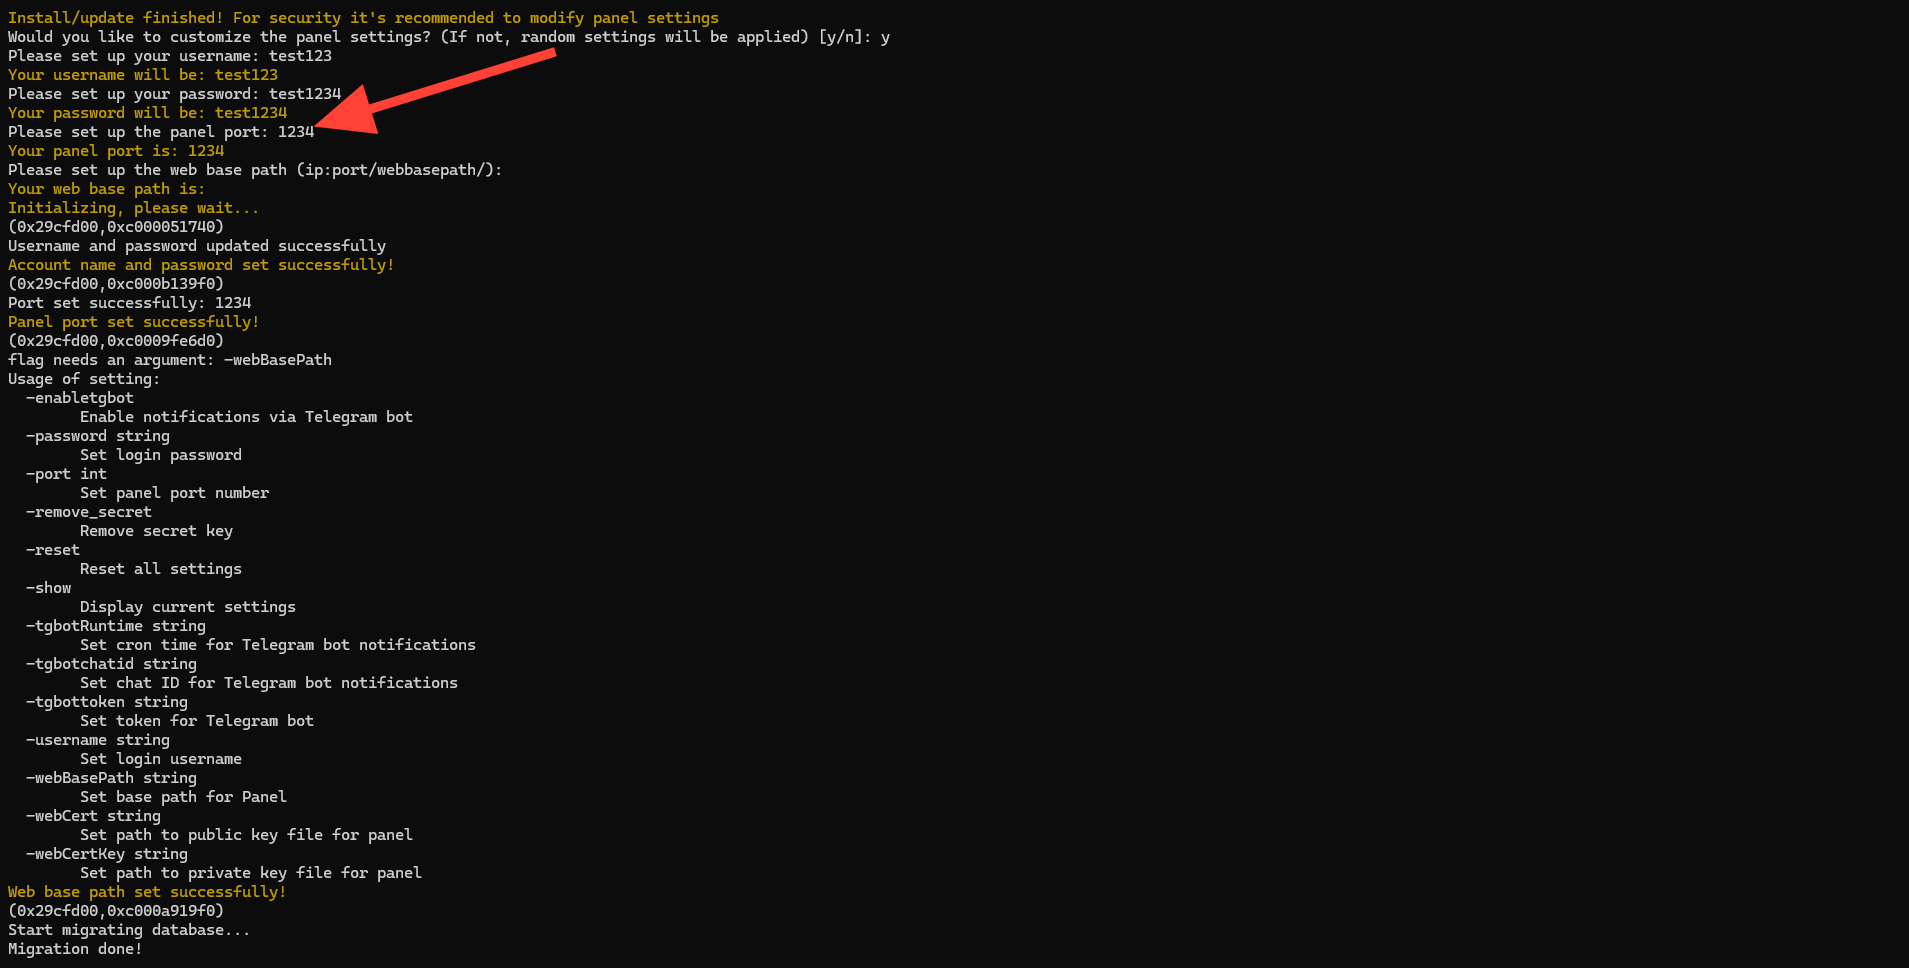
Step 5: Login into the Panel
Log in to the panel for the first time using the temporary password you specified during installation.
Go to the browser and type your domain name using HTTP and panel port.
Example: http://ayush7614.com:1234

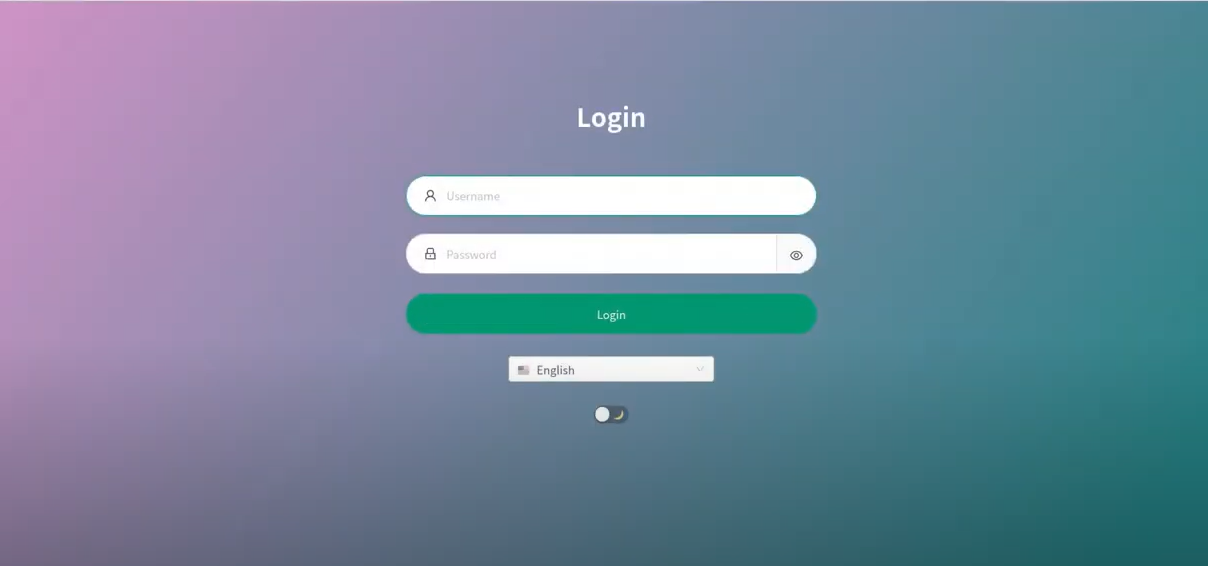
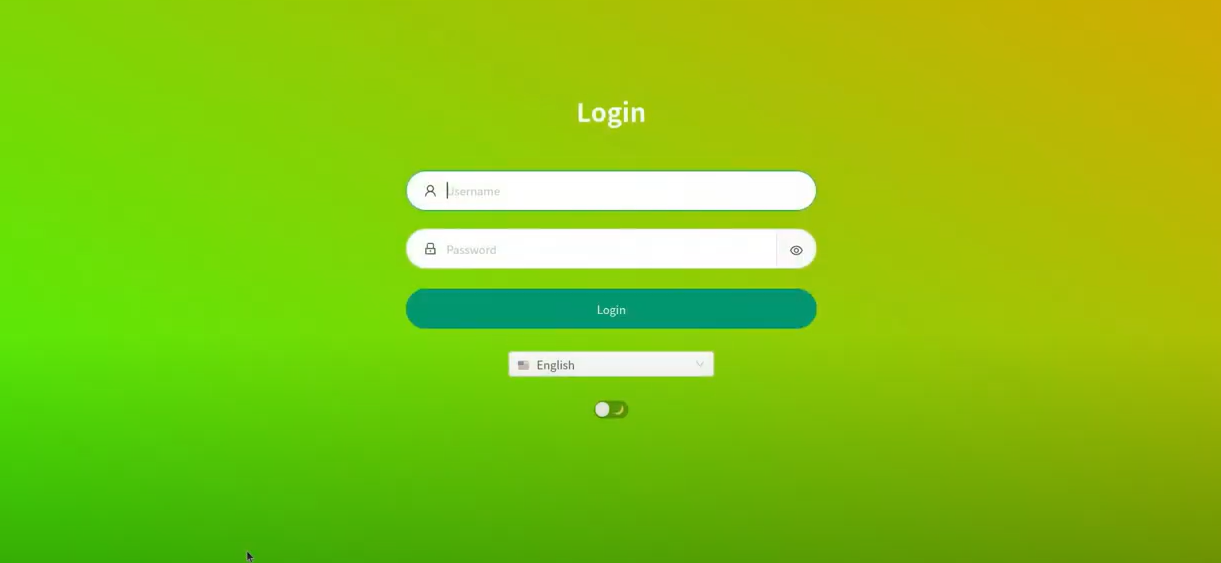
After this, you will see the login page UI.
Add username and temporary password for login.
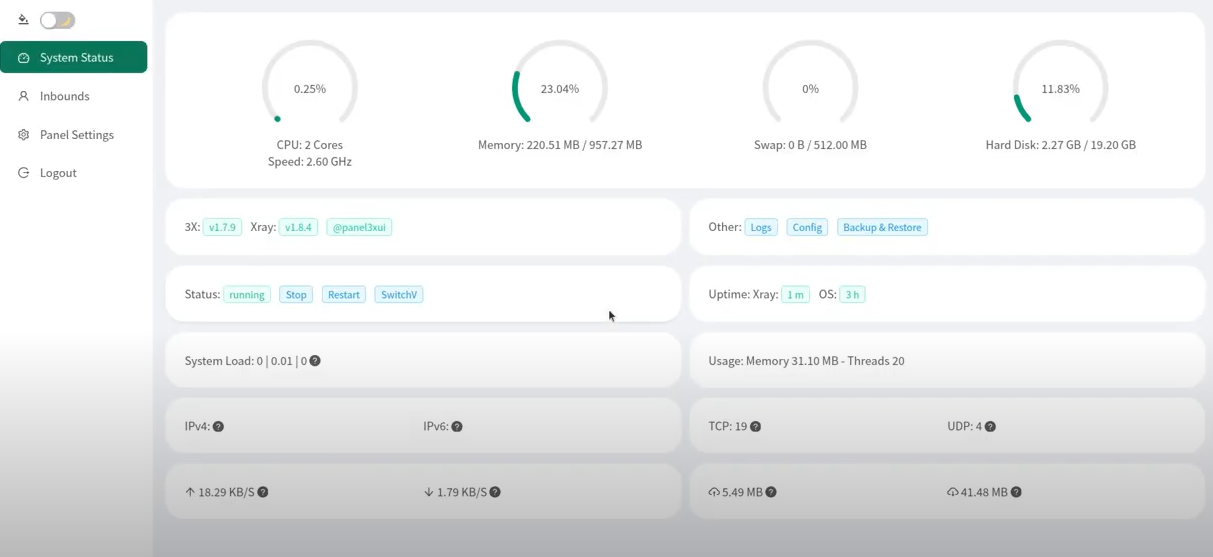
After logging in, you will see the following user interface page.
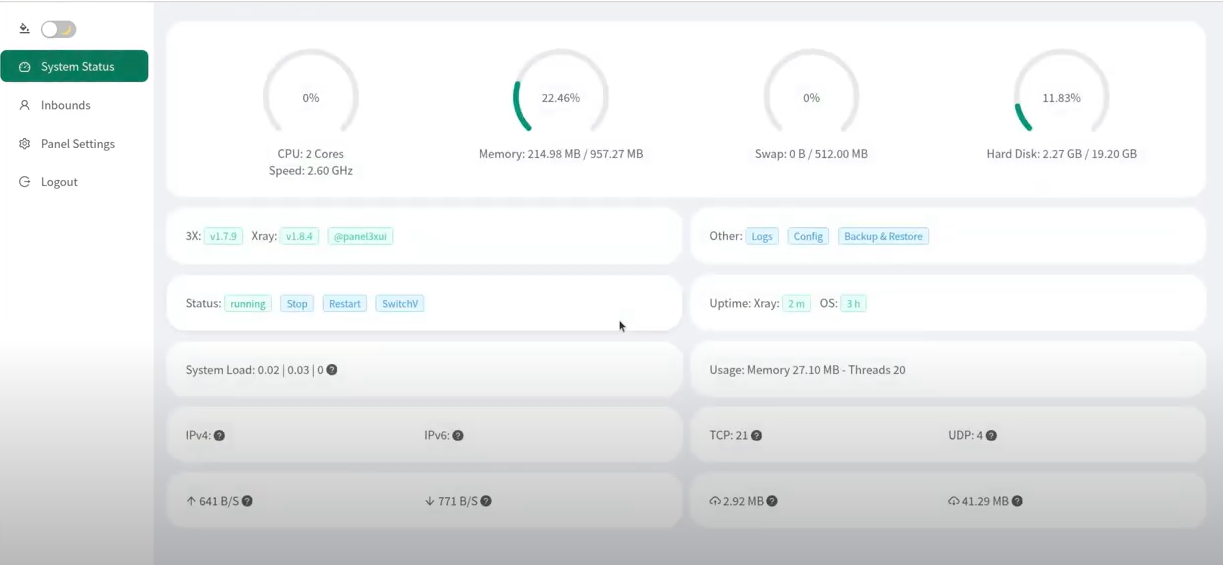
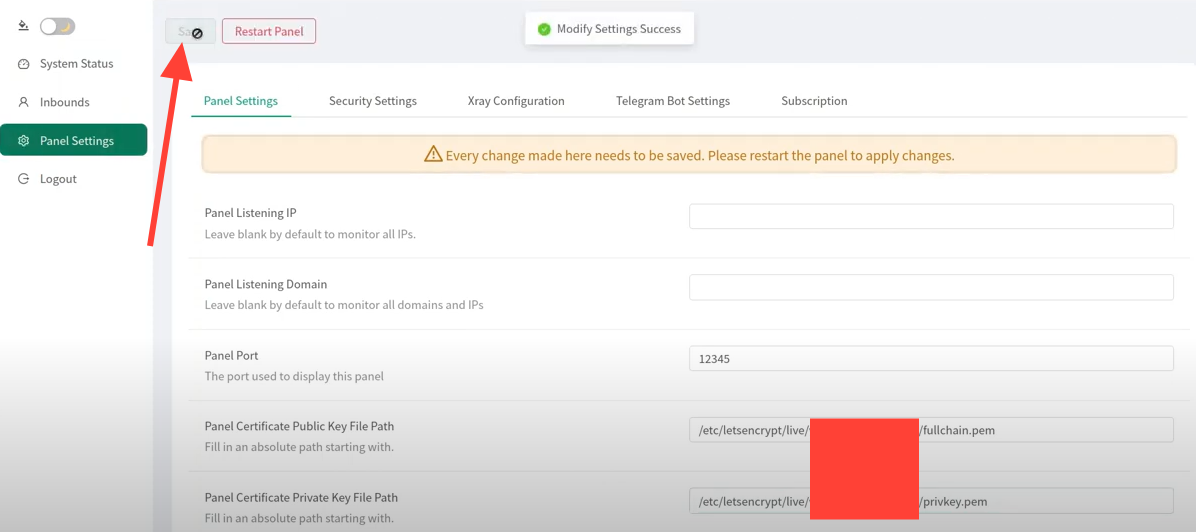
Step 6: Specify the location of your certificate and SSL key
Now, specify the location of your SSL certificate and key in the panel settings.
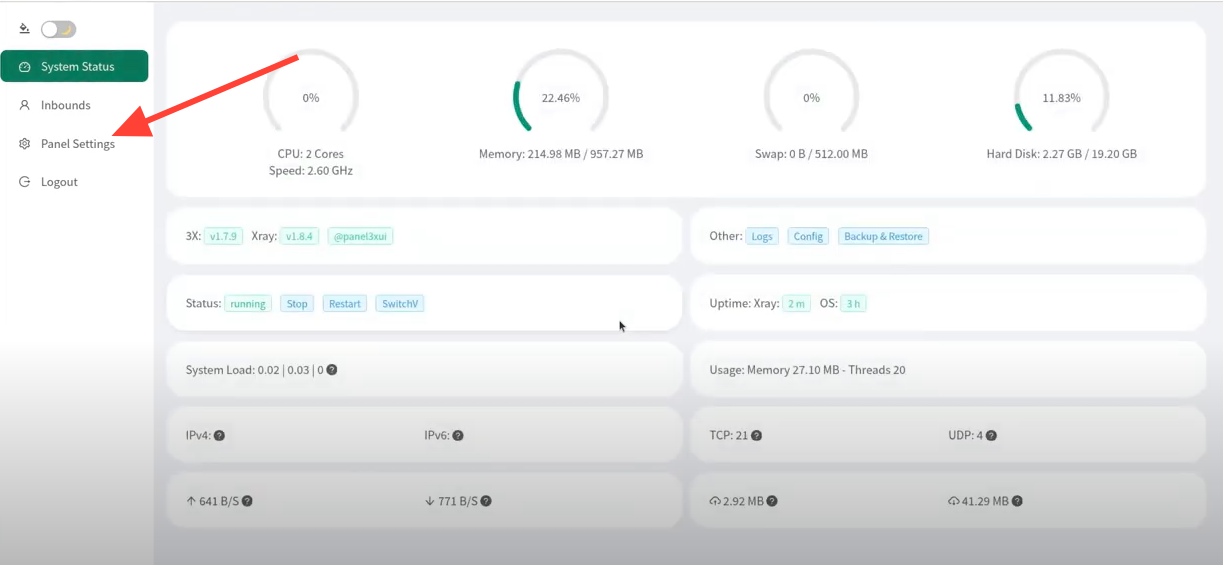
Click on the panel settings option and add the path to the panel certificate's public key file.
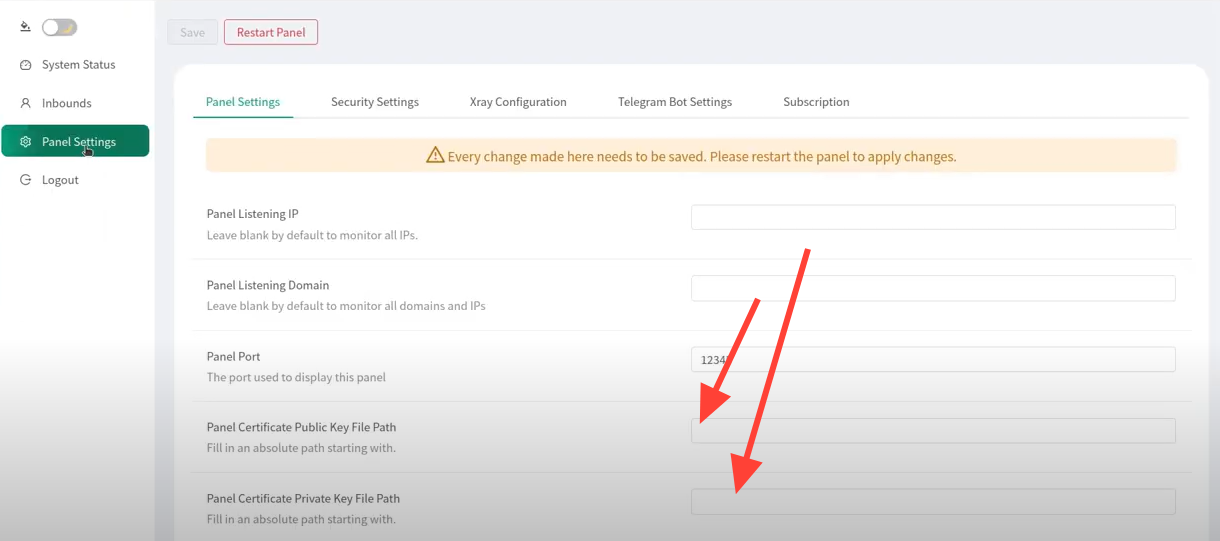
After adding the panel certificate's public key file path, click the save button on the left side and restart your panel.
Step 7: Change the Password
Now that you have HTTPS security, change the temporary password to a permanent password.
Click on the security settings option, change the username and password, and click the confirm button.
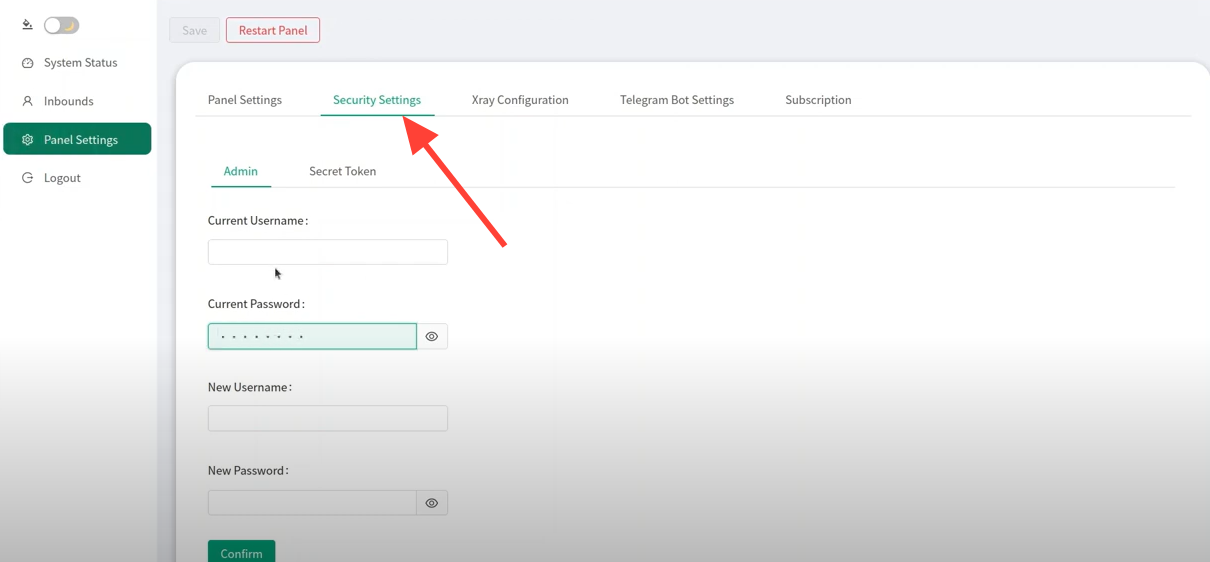
"Log in to the UI again using the new username and password."
Step 8: Add an inbound for XRAY reality
After authorization in the 3X-UI panel, go to the Inbounds tab and click the Add Inbound button:

Then, you have to fill out the following fields in the menu that opens:
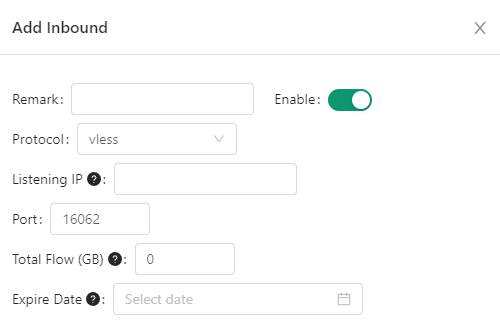
- Remark is the name of the connection.
- Protocol - the choice of protocol.
- Listening IP - if you leave this field empty, the server will listen to all IP addresses.
- Port – port 443 should be selected.
The Total Flow (GB) and Expiration Date fields are optional.
In the Client section, the following fields must be completed:
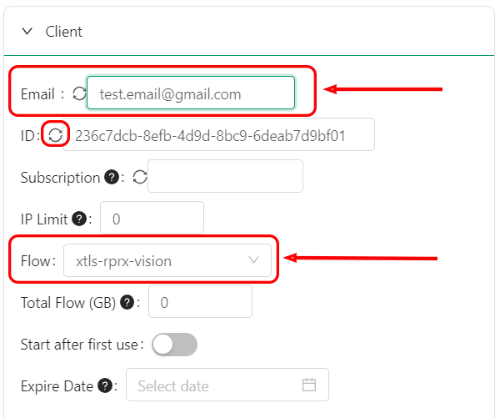
- Email - specifies an e-mail address. You can specify any value. This field is used to identify the user in the graphical panel, and when scanning a QR code, the data from this field will be used to generate the connection name.
- A unique identifier (UUID) is a 32-character string that identifies an incoming connection. It can be generated automatically using the button before the key entry field. The ID can only contain numbers and lowercase letters in the Latin alphabet.
- Flow - this field will appear only after the Reality item is activated below. After the field appears, you should select xtls-rprx-vision.
You can specify any value. This field is used to identify the user in the graphical panel, and when scanning a QR code, the data from this field will be used to generate the connection name.
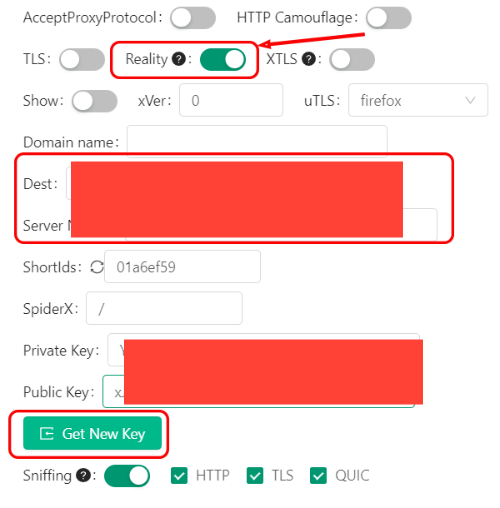
Activate the Reality option.
We recommend that you choose Chrome as the value of the uTLS option, but you can select any other value from the suggested list.
In the "Domain name" field, enter the address to connect to the server. The field can be left empty so the panel will create it automatically.
Click the Get New Keys button to generate new keys – a Public Key and a Private Key.
In the "Dest" and "Server Names" fields, enter the domain you want to use for masking. Make sure to choose a domain that is not blocked in the jurisdiction you are connecting from. It's advisable to avoid using the default "yahoo.com." For example, you can use domains like "www.microsoft.com:443," "dl.google.com:443," "www.samsung.com:443," "www.googletagmanager.com:443," etc.
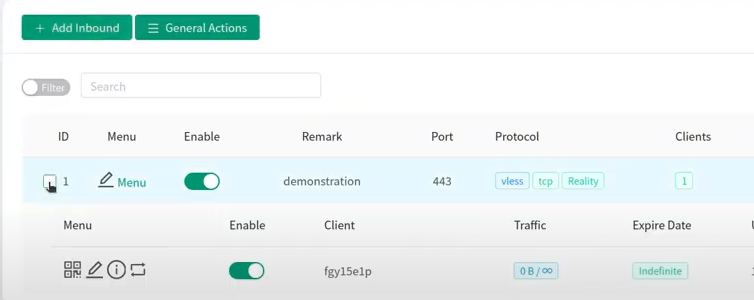
After filling everything out, press the "Create" button.
Windows OS
Before setting up a connection on your local device, you must configure a new connection in the 3X-UI GUI panel.
To connect to the 3X-UI using the Nekoray client, you must:
1. Install and start the client.
When installing the client, the core—sing-box must be specified. You can change the core in the already installed client by going to Preferences >> Basic settings >> Core.
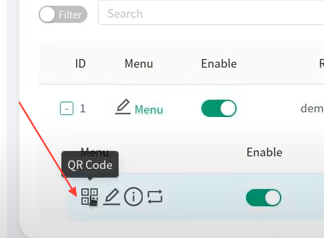
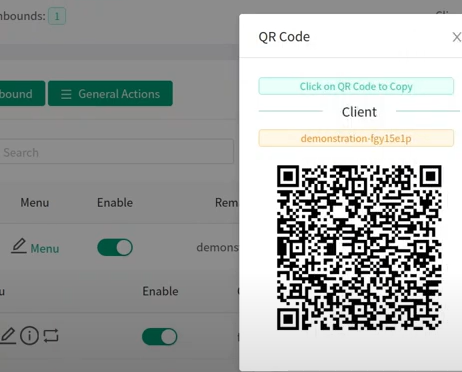
2. In the 3X-UI graphic panel, open the QR code containing the settings for the connection:
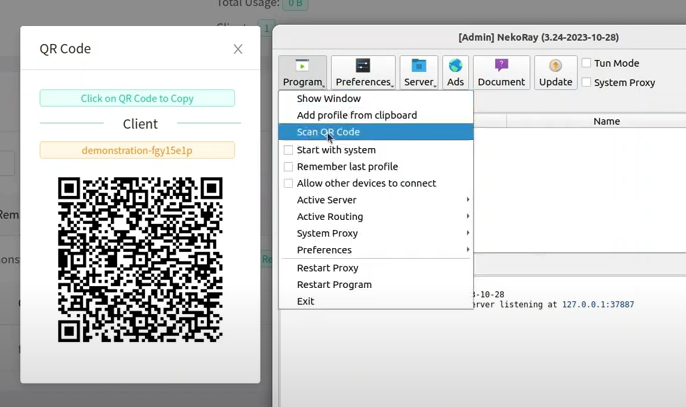
3. Go to the Program menu and select Scan QR Code:
4. Check the box labeled VPN Mode;
5. Start the connection by right-clicking on its name and selecting Start.
Conclusion
3X-UI offers a powerful and flexible solution for secure internet access in today's ever-changing digital landscape. In this guide, we defined the 3x-ui requirements and provided step-by-step instructions on setting up 3x-ui in the Cloud. From installation to accessing the UI and Adding inbound for XRAY reality on different OS.
For more information about NodeShift: