How to Install and Run CogVideoX-5b Video Generator Locally

CogVideoX-5B, developed by Zhipu AI, is a state-of-the-art text-to-video model that generates high-quality videos from text prompts. This model uses a 3D Causal VAE and Expert Transformer architecture to ensure consistent and smooth video sequences, making it ideal for complex motion and detailed semantic generation.
This open-weights model not only pushes the boundaries of what’s possible in video generation but also democratizes access to such powerful technology, revolutionizing content creation across various industries.
CogVideoX 5B represents a significant leap forward in several key areas:
👉 Multimodal Integration: CogVideoX 5B demonstrates an unprecedented ability to translate textual descriptions into coherent, visually appealing video sequences by bridging the gap between natural language processing and computer vision.
👉 Accessibility: Like many AI models that require extensive computational resources, CogVideoX 5B has been optimized to run on consumer-grade hardware, making it accessible to a broader range of researchers, developers, and content creators.
👉 Open-Source Philosophy: The decision to release CogVideoX 5B with open weights aligns with the trend toward transparency and collaboration in AI research.
👉 Scalability: The release of the model's 5B and 2B parameter versions provides options for users with varying hardware capabilities, ensuring that the technology can be leveraged across a spectrum of use cases and resource constraints.
| Model Name | CogVideoX-2B | CogVideoX-5B (This Repository) |
|---|---|---|
| Model Description | Entry-level model, balancing compatibility. Low cost for running and secondary development. | Larger model with higher video generation quality and better visual effects. |
| Inference Precision | FP16* (Recommended), BF16, FP32, FP8*, INT8, no support for INT4 | BF16 (Recommended), FP16, FP32, FP8*, INT8, no support for INT4 |
| Single GPU VRAM Consumption | SAT FP16: 18GB diffusers FP16: starting from 4GB* diffusers INT8(torchao): starting from 3.6GB* | SAT BF16: 26GB diffusers BF16: starting from 5GB* diffusers INT8(torchao): starting from 4.4GB* |
| Multi-GPU Inference VRAM Consumption | FP16: 10GB* using diffusers | BF16: 15GB* using diffusers |
| Inference Speed (Step = 50, FP/BF16) | Single A100: ~90 seconds Single H100: ~45 seconds | Single A100: ~180 seconds Single H100: ~90 seconds |
| Fine-tuning Precision | FP16 | BF16 |
| Fine-tuning VRAM Consumption (per GPU) | 47 GB (bs=1, LORA) 61 GB (bs=2, LORA) 62GB (bs=1, SFT) | 63 GB (bs=1, LORA) 80 GB (bs=2, LORA) 75GB (bs=1, SFT) |
| Prompt Language | English* | |
| Prompt Length Limit | 226 Tokens | |
| Video Length | 6 Seconds | |
| Frame Rate | 8 Frames per Second | |
| Video Resolution | 720 x 480, no support for other resolutions (including fine-tuning) | |
| Positional Encoding | 3d_sincos_pos_embed | 3d_rope_pos_embed |
As the name suggests, CogVideoX 5B boasts approximately 5 billion parameters. This places it in the category of large language models, though it’s specialized for video generation tasks. The distribution of these parameters across different model components (e.g., text encoder, visual encoder, decoder) would significantly impact its capabilities and efficiency.
Step-by-Step Process Install and Run CogVideoX-5b Video Generator Locally
For the purpose of this tutorial, we will use a GPU-powered Virtual Machine offered by NodeShift; however, you can replicate the same steps with any other cloud provider of your choice. NodeShift offers the most affordable Virtual Machines at a scale that meet GDPR, SOC2, and ISO27001 requirements.
Step 1: Sign Up and Set Up a NodeShift Cloud Account
Visit the NodeShift Platform and create an account. Once you've signed up, log into your account.
Follow the account setup process and provide the necessary details and information.

Step 2: Create a GPU Node (Virtual Machine)
GPU Nodes are NodeShift's GPU Virtual Machines, on-demand resources equipped with diverse GPUs ranging from H100s to A100s. These GPU-powered VMs provide enhanced environmental control, allowing configuration adjustments for GPUs, CPUs, RAM, and Storage based on specific requirements.
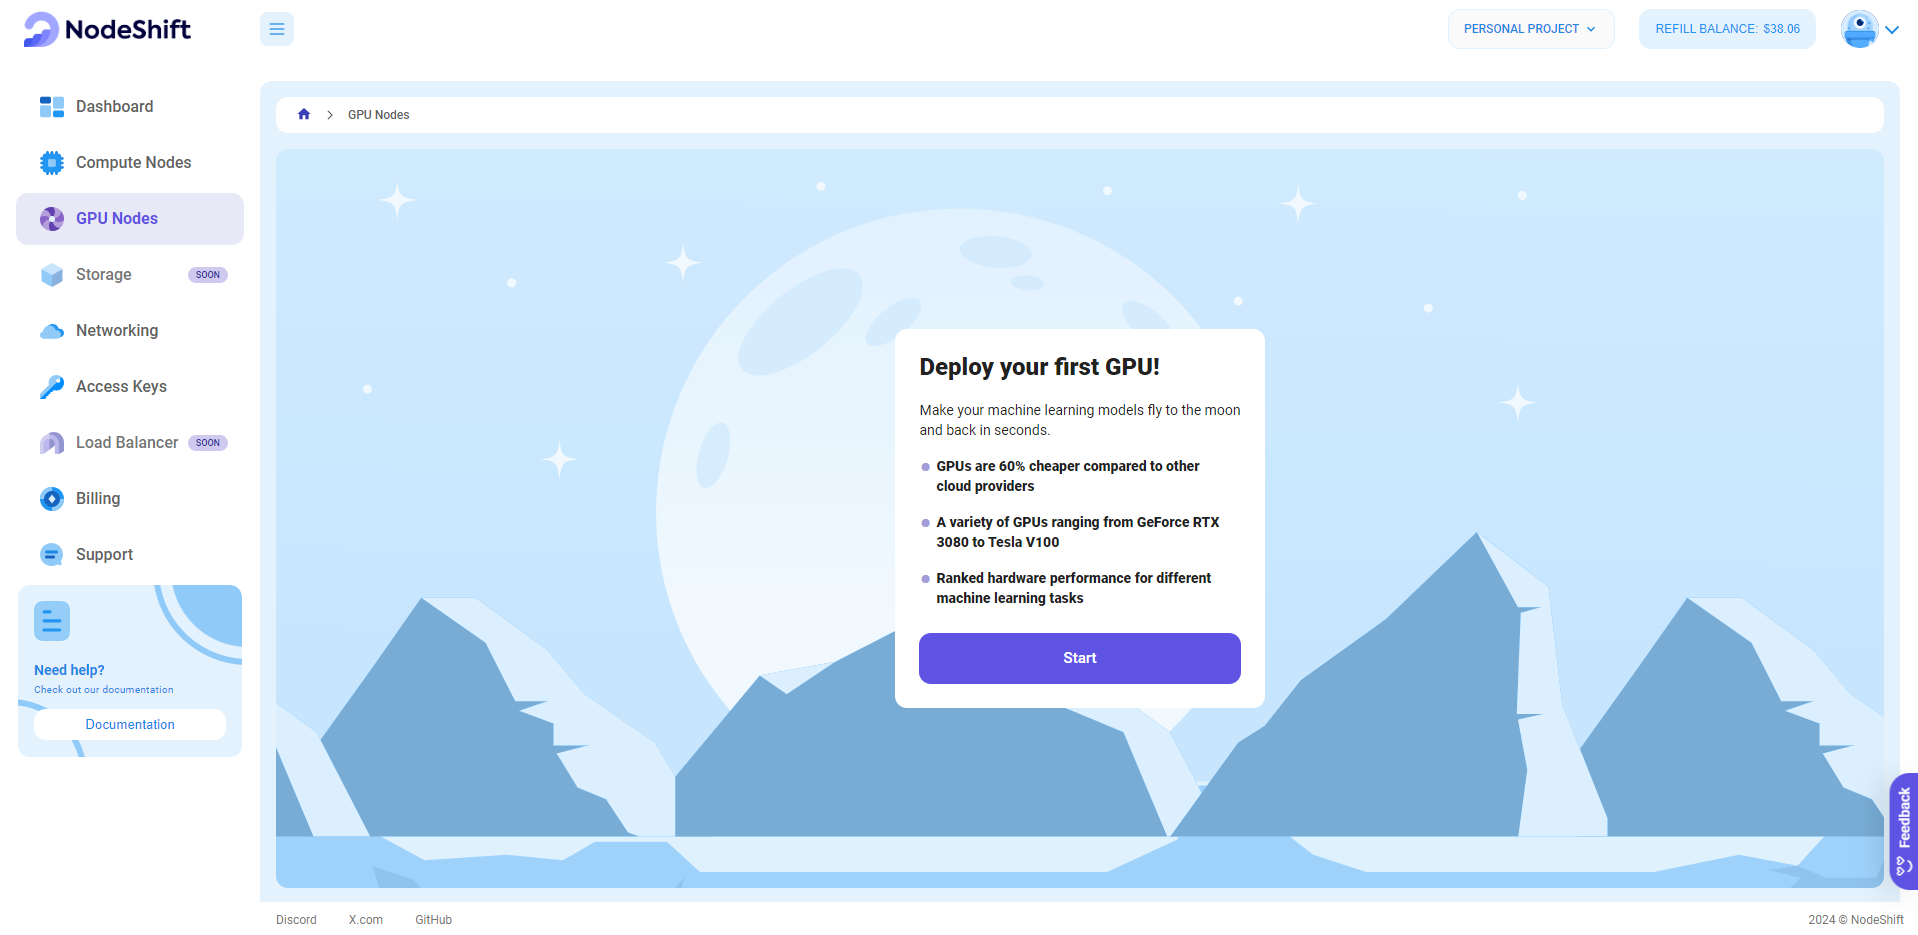
Navigate to the menu on the left side. Select the GPU Nodes option, create a GPU Node in the Dashboard, click the Create GPU Node button, and create your first Virtual Machine deployment.
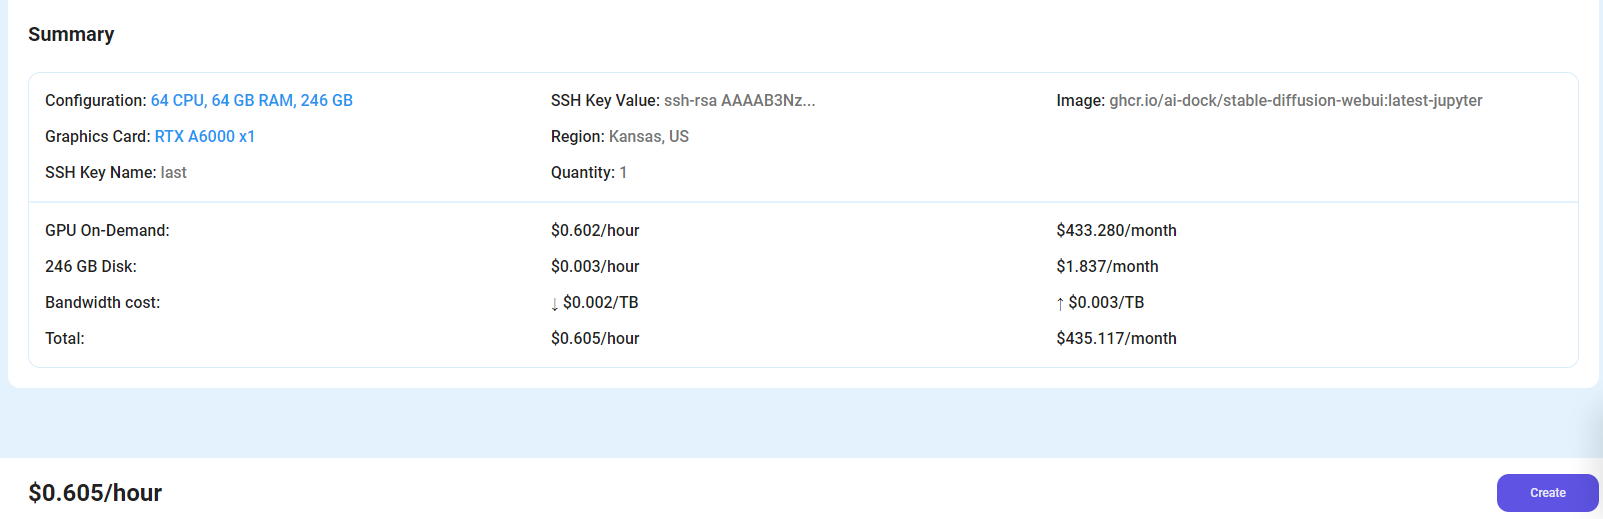
Step 3: Select a Model, Region, and Storage
In the "GPU Nodes" tab, select a GPU Model and Storage according to your needs and the geographical region where you want to launch your model.
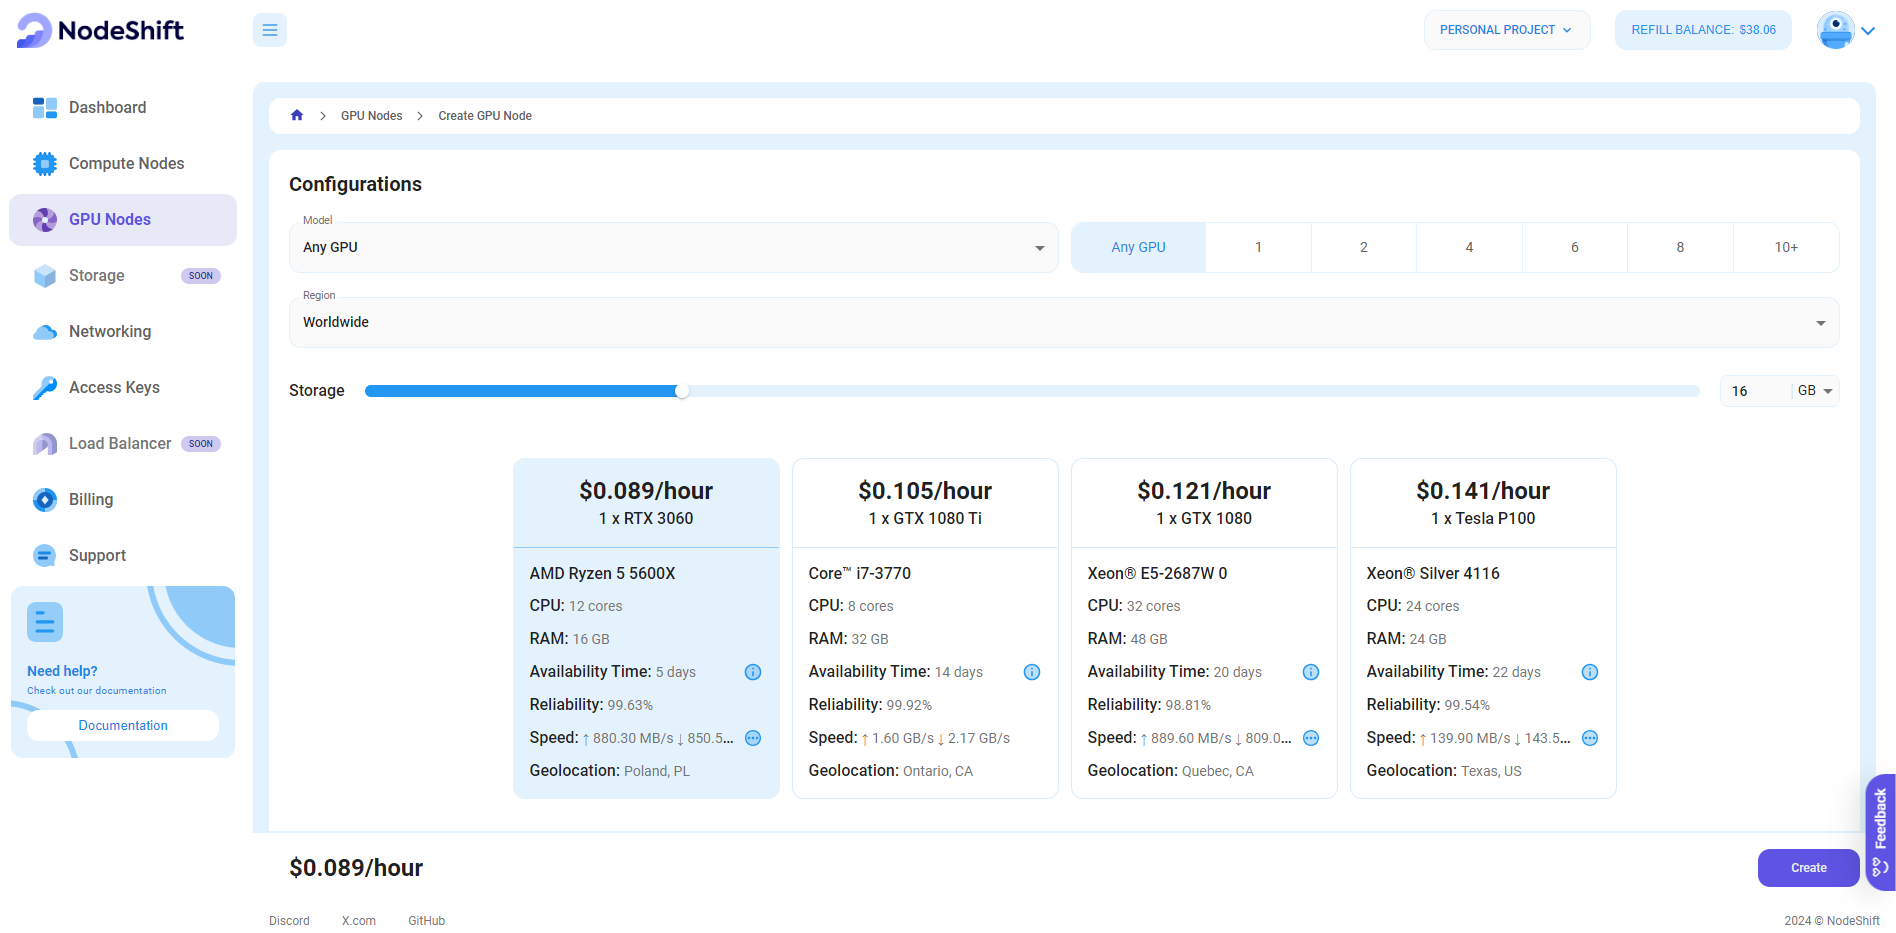
We will use 1x RTX A6000 GPU for this tutorial to achieve the fastest performance. However, you can choose a more affordable GPU with less VRAM if that better suits your requirements.
Step 4: Select Authentication Method
There are two authentication methods available: Password and SSH Key. SSH keys are a more secure option. To create them, please refer to our official documentation.

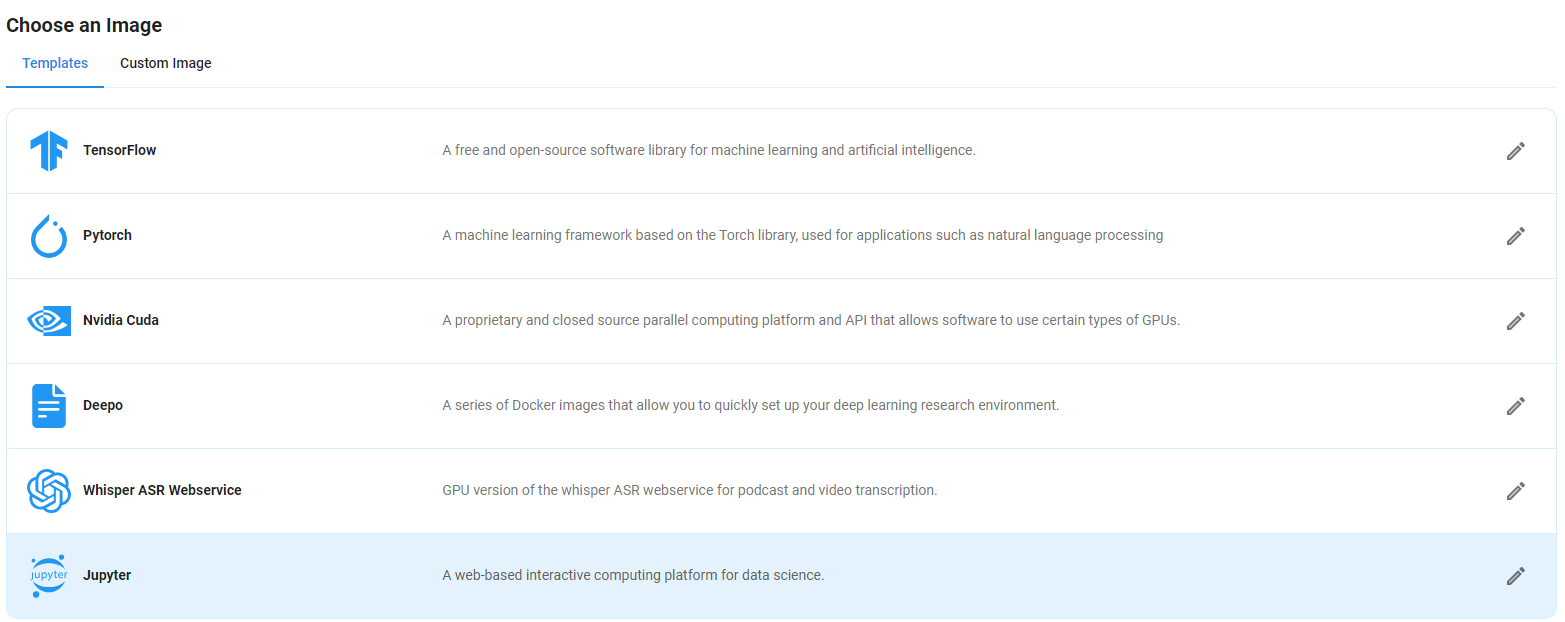
Step 5: Choose an Image
Next, you will need to choose an image for your Virtual Machine. We will deploy the CogVideoX-5b Video Generator on a Jupyter Notebook Virtual Machine. This open-source platform will allow you to install and run the CogVideoX-5b Video Generator on your GPU node. By running this model on a Jupyter Notebook, we avoid using the terminal, simplifying the process and reducing the setup time. This allows you to configure the video generator in just a few steps and minutes.
Note: NodeShift provides multiple image template options, such as TensorFlow, PyTorch, NVIDIA CUDA, Deepo, Whisper ASR Webservice, and Jupyter Notebook. With these options, you don’t need to install additional libraries or packages to run Jupyter Notebook. You can start Jupyter Notebook in just a few simple clicks.
After choosing the image, click the 'Create' button, and your Virtual Machine will be deployed.
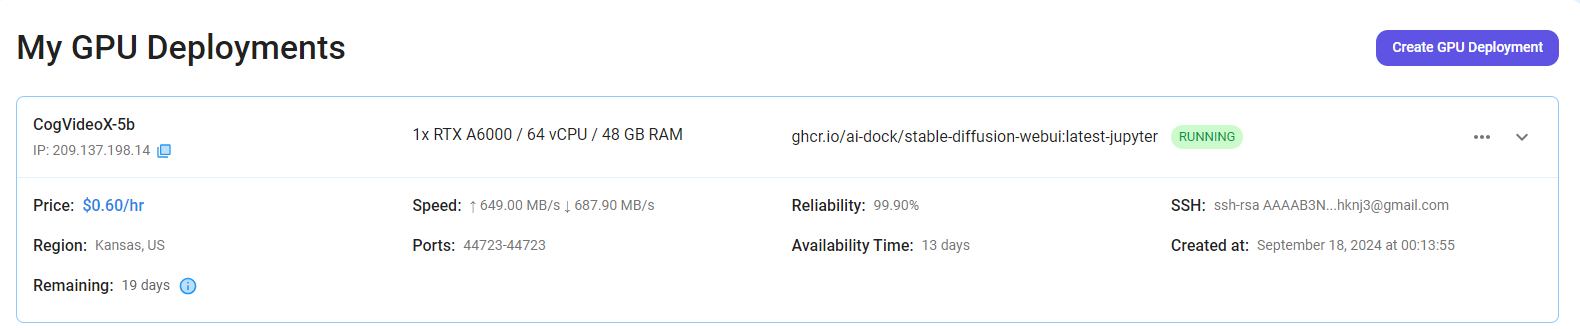
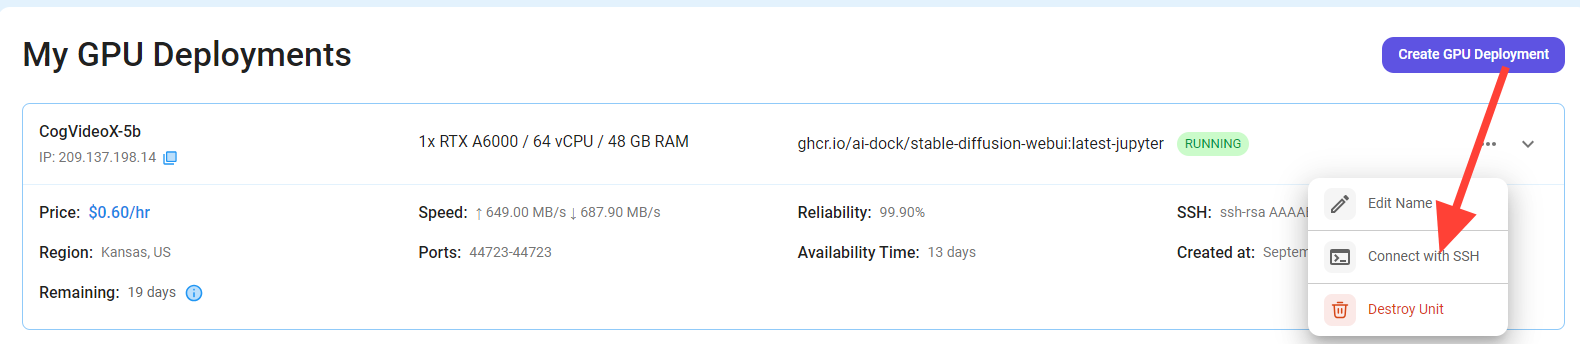
Step 6: Virtual Machine Successfully Deployed
You will get visual confirmation that your node is up and running.
Step 7: Connect to Jupyter Notebook
Once your GPU VM deployment is successfully created and has reached the 'RUNNING' status, you can navigate to the page of your GPU Deployment Instance. Then, click the 'Connect' Button in the top right corner.
After clicking the 'Connect' button, you can view the Jupyter Notebook.
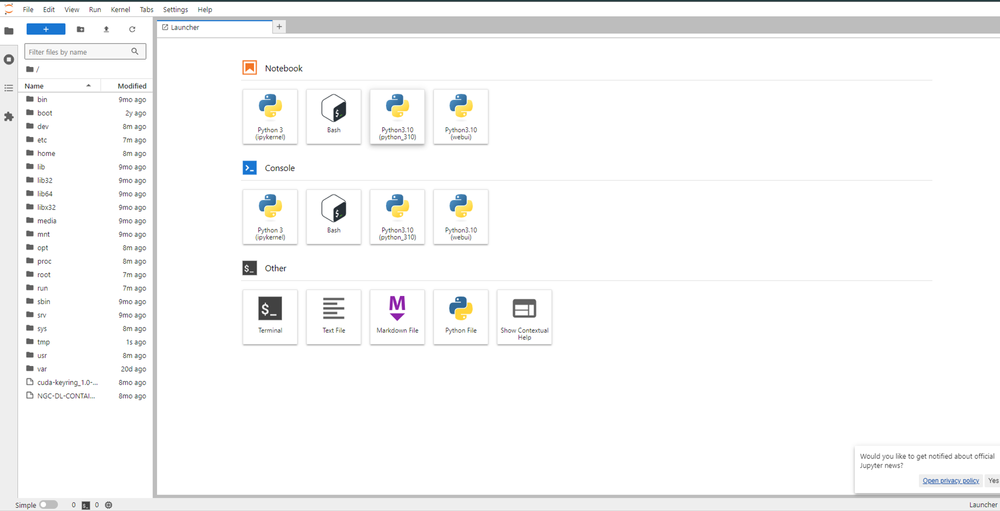
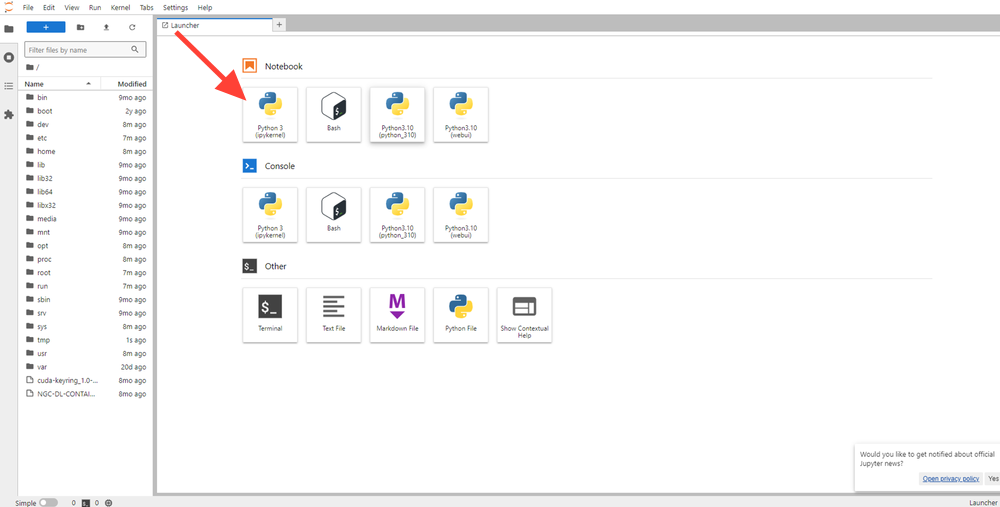
Now open Python 3(pykernel) Notebook.
Next, If you want to check the GPU details, run the command in the Jupyter Notebook cell:
!nvidia-smi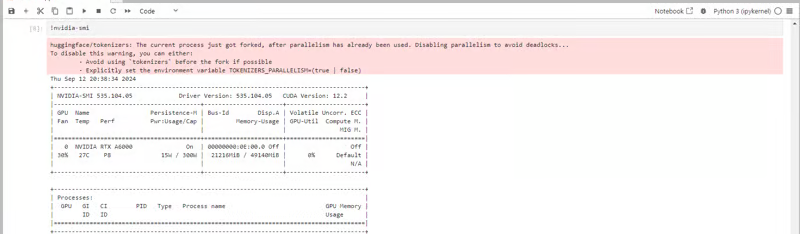
Step 8: Install the Torch Library
Torch is an open-source machine learning library, a scientific computing framework, and a scripting language based on Lua. It provides LuaJIT interfaces to deep learning algorithms implemented in C.
Torch was designed with performance in mind, leveraging highly optimized libraries like CUDA, BLAS, and LAPACK for numerical computations.
Run the following command in the Jupyter Notebook cell to install the Torch Library:
pip install torch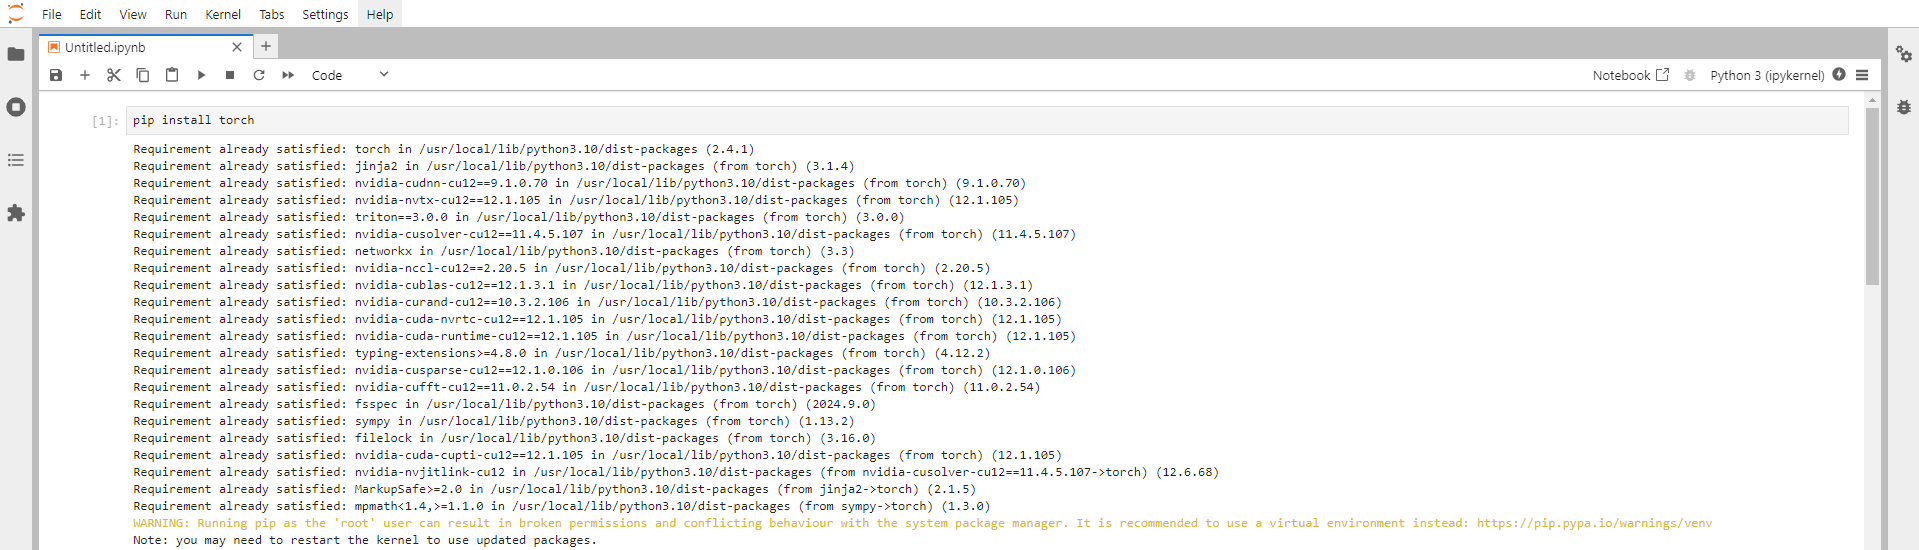
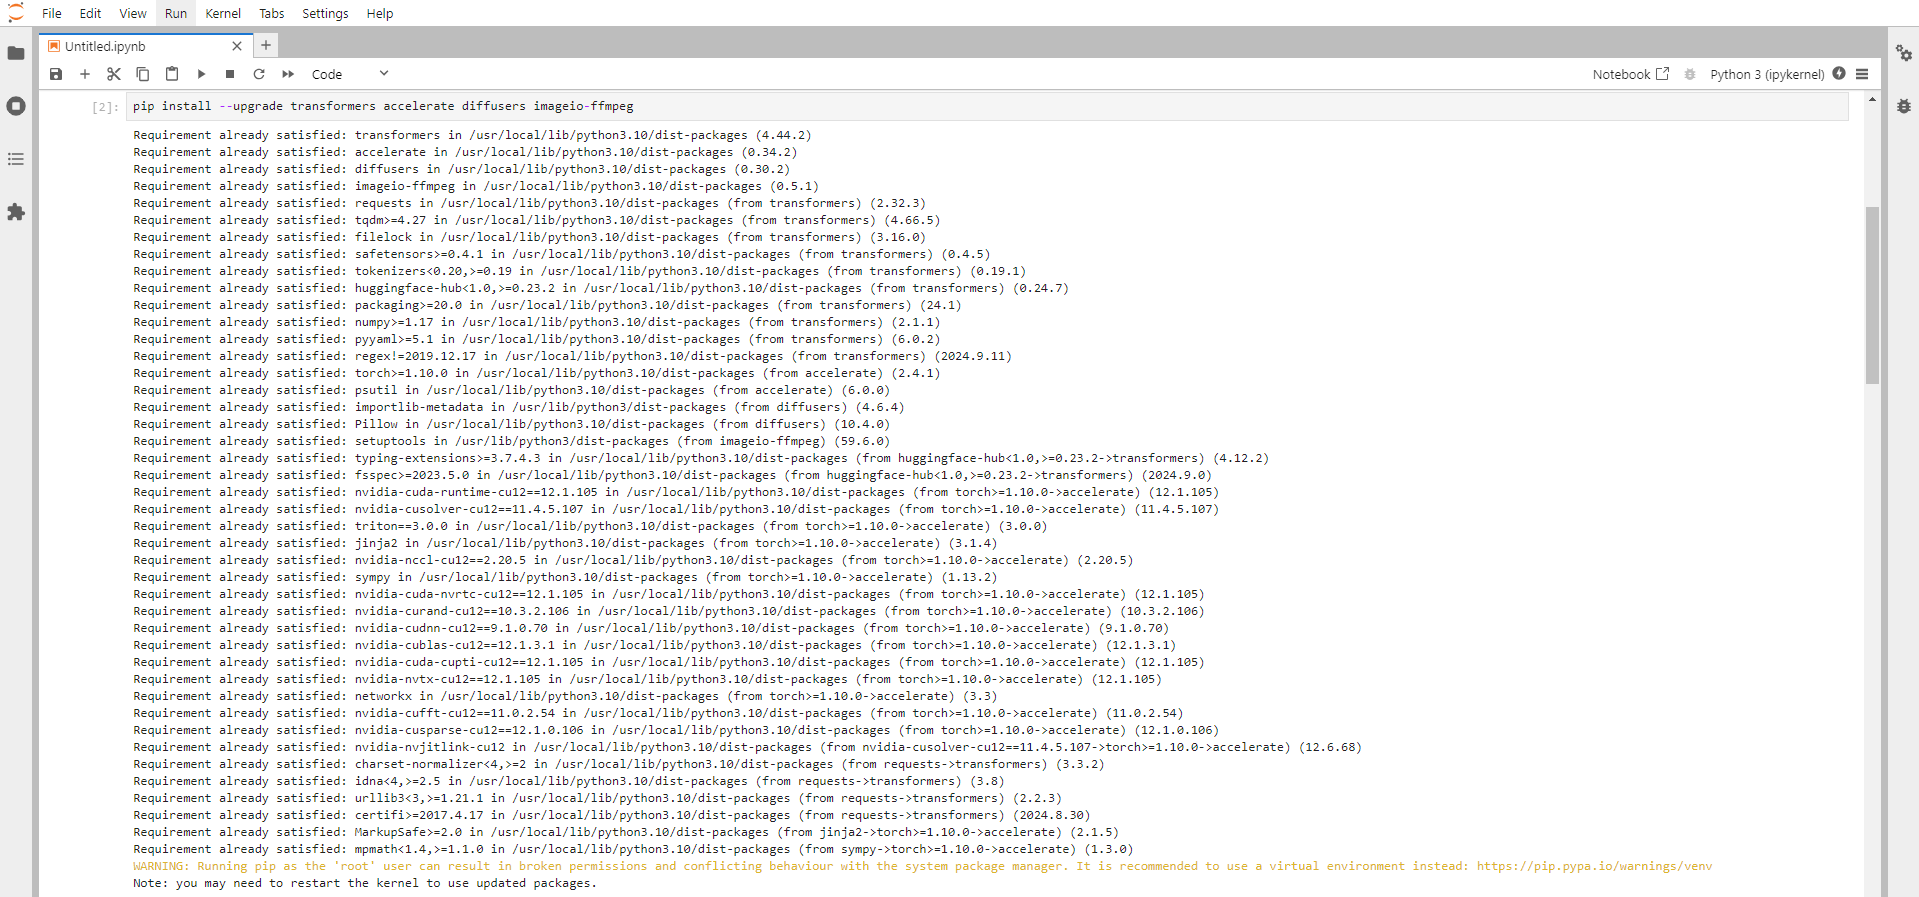
Step 9: Install the required dependencies
Run the following command in the Jupyter Notebook cell to install the required dependencies:
# diffusers>=0.30.1
# transformers>=4.44.2
# accelerate>=0.33.0 (suggest install from source)
# imageio-ffmpeg>=0.5.1
pip install --upgrade transformers accelerate diffusers imageio-ffmpeg
This command is used to install or upgrade several Python packages.
Transformers
Transformers provide APIs and tools to download and efficiently train state-of-the-art pre-trained models. Pre-trained models can reduce computing costs and carbon footprint and save the time and resources required to train a model from scratch.
Accelerate
This library, also by Hugging Face, is designed to simplify the efficient running of machine learning models across different hardware (like CPUs and GPUs) and support mixed precision training.
Diffusers
This library, again from Hugging Face, is used for diffusion models, a generative model. It's useful for tasks like image generation and manipulation, enabling the use of pre-trained models that create images from text prompts or noise.
imageio-ffmpeg
This package provides a Python binding for FFmpeg, a robust multimedia framework. It's often used for tasks that involve video processing, such as reading, writing, and converting video files. This is useful when handling video inputs or outputs, like generating or processing video frames.
Step 10: Install the imageio-ffmpeg and opencv-python
Run the following command in the Jupyter Notebook cell to install the imageio-ffmpeg and opencv-python:
pip install imageio imageio-ffmpeg
pip install opencv-python
pip install sentencepiece
Imageio
Imageio is a Python library that provides an easy interface for reading and writing various images, including animated images, video, volumetric data, and scientific formats.
OpenCV
OpenCV stands for Open-Source Computer Vision (Library). It is the most common and popularly used, well-documented Computer Vision library. OpenCV is an open-source library that incorporates numerous computer vision algorithms. OpenCV increases computational efficiency and assists with real-time applications.
Sentencepiece
SentencePiece is a simple, efficient, and language-independent subword tokenizer and detokenizer designed for Neural Network-based text processing systems. It offers lossless tokenization, customizable character normalization, self-contained models, and on-the-fly processing capabilities.


Step 11: Run the CogVideoX code
Execute the following command in the Jupyter Notebook cell to Run the CogVideoX model code:
import torch
from diffusers import CogVideoXPipeline
from diffusers.utils import export_to_video

pipe = CogVideoXPipeline.from_pretrained(
    "THUDM/CogVideoX-5b",
    torch_dtype=torch.bfloat16
)

pipe.enable_model_cpu_offload()
pipe.vae.enable_tiling()
Step 12: Enter and Run the Prompt
Now Finally, Enter and Run the prompt:
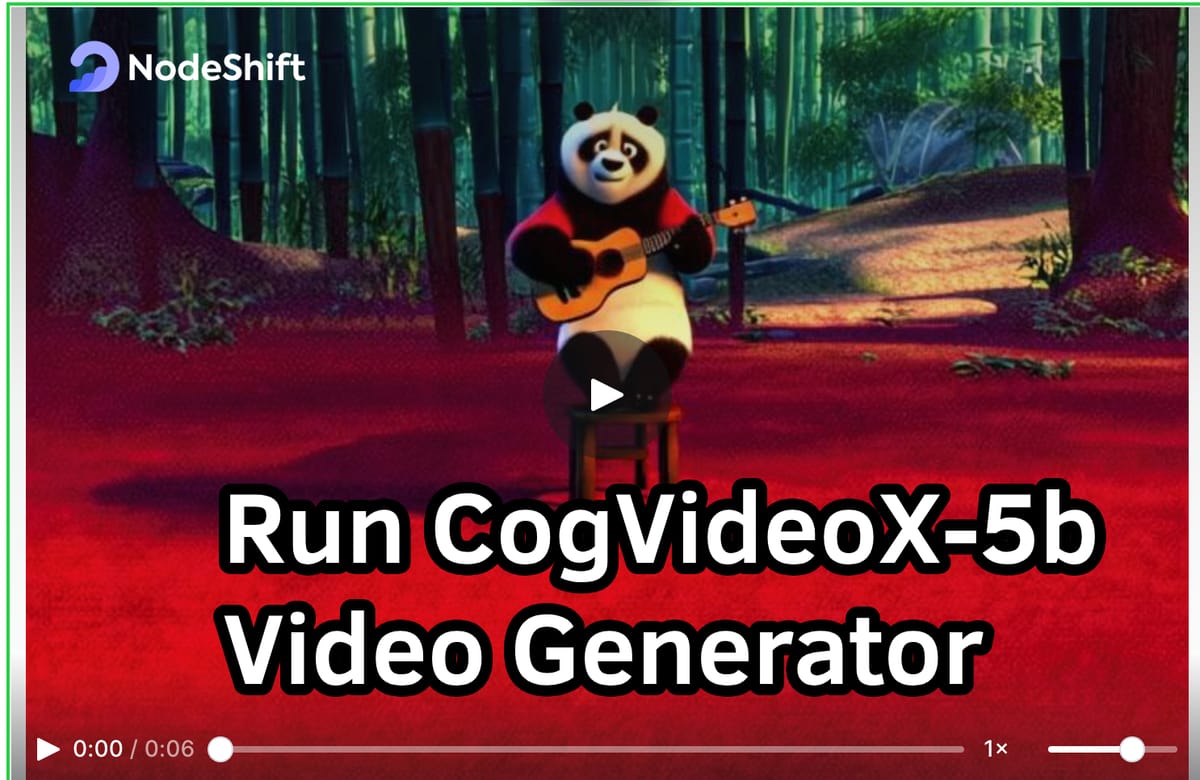
prompt = "A panda, dressed in a small, red jacket and a tiny hat, sits on a wooden stool in a serene bamboo forest. The panda's fluffy paws strum a miniature acoustic guitar, producing soft, melodic tunes. Nearby, a few other pandas gather, watching curiously and some clapping in rhythm. Sunlight filters through the tall bamboo, casting a gentle glow on the scene. The panda's face is expressive, showing concentration and joy as it plays. The background includes a small, flowing stream and vibrant green foliage, enhancing the peaceful and magical atmosphere of this unique musical performance."

video = pipe(
    prompt=prompt,
    num_videos_per_prompt=1,
    num_inference_steps=50,
    num_frames=49,
    guidance_scale=6,
    generator=torch.Generator(device="cuda").manual_seed(42),
).frames[0]

export_to_video(video, "output.mp4", fps=8)
Step 13: Display the video directly in a Jupyter Notebook
Run the following command in the Jupyter Notebook cell to display the video directly in Jupyter Notebook:
from IPython.display import Video

# Display the video
Video("output.mp4", embed=True)
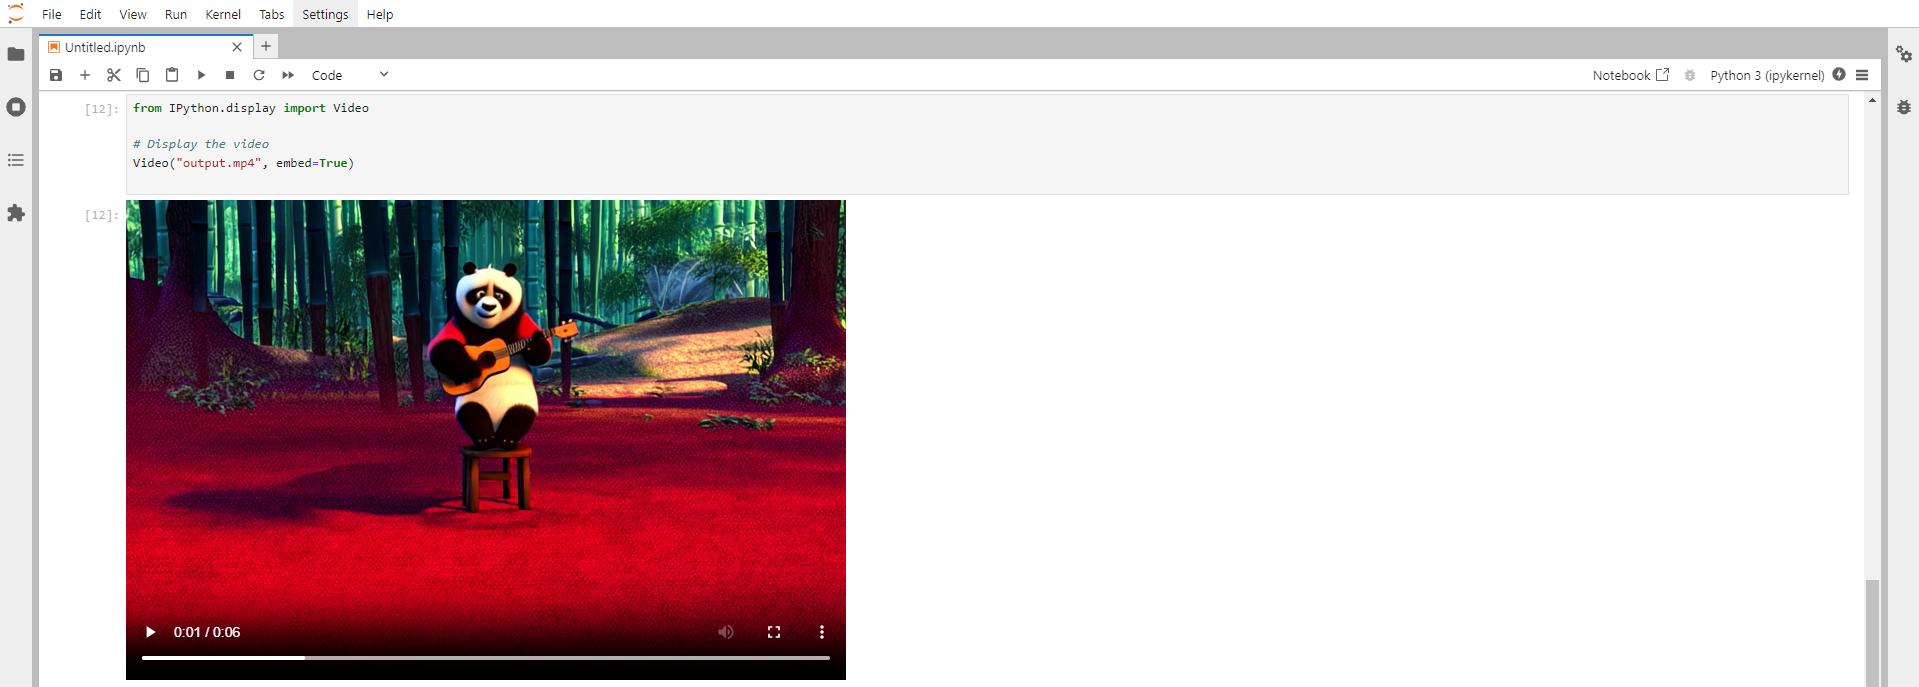
Enjoy the Final Video!
Conclusion
In this guide, we've walked through setting up and running the CogVideoX-5b Video Generator Locally on a GPU-powered virtual machine. With CogVideoX, you now have the tools to create stunning, high-quality videos, whether for commercial projects or personal exploration. By following these steps, you have the power of advanced AI video generation while enjoying the flexibility and efficiency that CogVideoX offers.
For more information about NodeShift: